Showing posts with label birds. Show all posts

Sunday, 28 September 2014

Hold Fast to Dreams - A Craft Artist 2 home decor project tutorial

Hi all

I've created another tutorial for you using digi kits from the Victoria Nelson collection using Craft Artist 2 professional. Remember you don't have to use the content I have or follow the design to the letter make it your own .... unleash your creativity.

This is the piece of home décor I am going to create


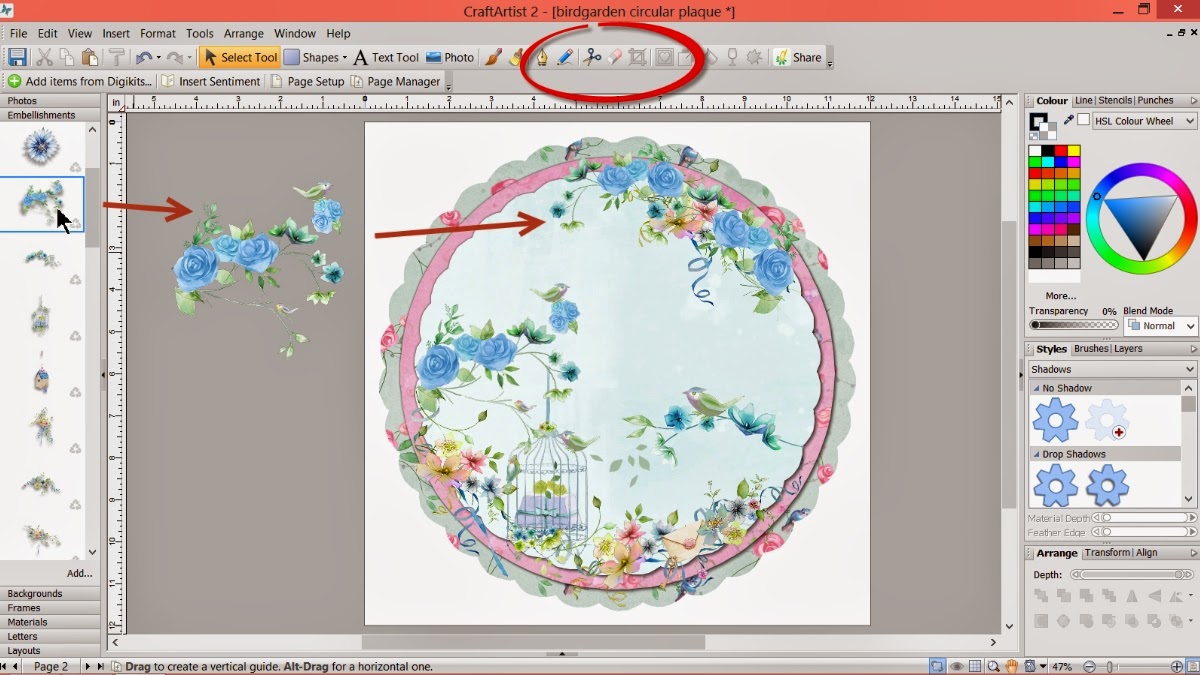
I created it on a 12 x 12 page set up and the finished piece is about 10 x 10. I have used the Victoria Nelson Bird Garden digi kit .... so pretty!


I added some material to my page and resized it almost to the edges, I then aligned it centrally with the vertical and horizontal buttons in the align tab bottom right, this meant that every layer would sit in exactly the right place as I aligned each one the same as I built up the design, even the circle punch that I dragged on a resized was aligned centrally every time. (If you hold the CTRL or control key down as you resize the punch it will stay perfectly circular for you!)


Before I punched the circle I added a decorative edge to the punch by going to the third tool bar while the punch was selected and from the scissor type drop down menu selected the bump edge and then increased the wavelength and amplitude values (play around with these to get the pattern you want, I always call it the smoothness and bumpiness :D) When I was happy I clicked punch on the bottom right corner and deleted the waste area.


I added two more layers of material in the same way, aligning them to the centre and adding shadows to bring the design to life.


I then started adding the pretty embellishments to build my design ....


.... twisting things with the ball tool and flipping them if necessary with the tools in the arrange tab. I also erased away bits of the images if they didn't look right or over hung my design by selecting the embellishment and picking up the erase tool on the 2nd tool bar.


I added further detail with the envelope and keys embellishments after erasing away the bits I didn't want and re sizing them accordingly then adding them in place arranging them backwards via the arrange tab.


I continued to add detail to the top right of my design to balance it, again twisting etc as needed and erasing bits I didn't want ....


.... like the birds on the blue roses.


And lastly I added my quote using the text tool. Click on the A text tool button, click on your work space, choose a font and size and type then click edit points on the bottom right and push against the wrap text nodule to put the text in a line, clicking the centre button under the text tool button aligns the words accordingly. I also recoloured the lettering with the colour palette.


And that's it a pretty piece of home décor. You could just print it out and hang it on the wall, you could add it to a wooden plaque, you could print off the separate layers and hybrid it or add it into another design the choice is yours!

I hope you have enjoyed this tutorial and I thank you for popping by. I'll see you soon but maybe a little while longer than normal as I have some shows to prep for so bare with me ;) but until then, as always

Happy Crafting
Love
MJM x

Tuesday, 28 June 2011

A {tweet} project

Hi all
Last month I had the pleasure of teaching at the Scrap-a-Mia retreat and loved being able to share some of the Glitz Designs papers from the Aftenoon Muse line with the delegates. This is what I created;


A scrappy piece of home decor.

When you look closely there are so many colours in the Afternoon Muse line we were able to mix things up a bit so everyone could have a colour scheme that suited them from lilac to peach!


We constructed the cage from mountboard, covering it in paint and stamps and the Glitz papers made the pop up frame in the centre which was double sided so it looks good from all angles.


With the addition of some elements sheets put together from old scraps and some handmade net flowers there was a veritable feast of birdcages to coo over.

Remember somtimes when you look at pattern paper really look at it to see what other colours are lurking and also don't always see it as a solid sheet of pattern, imagine small flashes of it within a project and you'll be surprised how different that one piece of paper can look!

Thanks for stopping by, I'll be back soon, until then Happy Crafting
Love
M x

Papers used;
Glitz Designs Afternoon Muse; Stripe, Banner and Polka

Wednesday, 30 March 2011

A {Tweet} Froggity Blog hop!

Hi all

Well another month of 2011 gone and it means it's the Banana Frog blog hop time once again! With Spring in the air the theme for this month is birds and I hope you've been enjoying the {tweet} offerings from all the other froglets :) If you're here without hopping why not hop on over to the Lilly pad and start at the beginning to be inspired!

So without further ado here is my feathery offering for March ...


Is it a piece of wall art? is it an embellishment? or is it a bespoke brooch? ... the answer I think is all of the above! It's small and cute and oh so easy to make.

I used the Hiya Chick stamp set and the shake your tail feathers tadpole stamp set alongside some chipboard, music paper, gesso, distress inks, blonde moments embossing powder, small flowers and bling, some scrap paper and some craft wire. (by the way both stamp sets are on sale at the moment go grab a bargain!!)


Using the transparent image sheet in with the stamps I was able to draw out a template big enough to accommodate the bird on the branch and then cut this from a piece of chipboard.


I covered it in strips of music paper..


.... then trimmed it to shape and painted it with gesso.


I coloured it with distress inks ..


... and then stamped the end of the branch around the outside for a decorative pattern and embossed the bird. Some of the embossing powder stuck to the pattern I had stamped, a happy accident as I like the way it fills the branch out :)


Stamping the sentiment from the tadpole set ...


.... I then cut it up, inked it and added it to my collage along with some tiny paper flowers.


Leaving my collage aside to dry I made a wire cage to go over the top of my compositon. A little fiddly but worth the 'slightly' blue air in my studio LOL


I slipped the cage over the top of my chipboard collage...


...and attached the craft wire at the back with masking tape.


To finish off the back I glued some scrap paper onto it, trimming away excess with a craft knife and sanding any rough bits with a nail file


et voila, a cute little birdcage that could be used for anything you like!


I like it as a little wall plaque and think it would look great as a set of 3 but also think it would look great as an embellishment on a special card or scrap page and would look cool as a brooch by just adding a brooch pin to the back .... why not have a go and show me what you do with yours?

Thankyou for visiting my little corner of the lilly pad today your next hop stop is with the lovely and oh so talented Jo Firth Young and don't forget to leave comments where ever you go there may be prizes!

I hope you're well and happy and until soon Happy Crafting
Love
M x

PS My limited edition Art Tart DIY project CD's are available on my website see the post under this one for details and links ... why not try something different today :)