Showing posts with label vintage. Show all posts

Tuesday, 7 June 2011

A Glitzy Beach hut and a Glitzy dad!!

Hi all, for my Glitz offering this month I decided to swap one of my layouts for something a little different ....


Oh I do love to be beside the seaside!! And the fabulous Afternoon muse papers with a few other Glitzy bits from the other lines were perfect to create my little piece of summery home decor ... here's the ingredients;
Glitz Designs Afternoon Muse papers; Stripe, Polka, Floral, Block and Carte Postal
Glitz Designs Laced with Grace paper; plaid
Glitz Designs Afternoon Muse Glitzers
Glitz Designs Love Games Paper layers
Glitz Designs Love Games cardstock stickers - titles
Glitz Designs clear distressing stamps set 3


I cut out my pieces for construction from some chipboard...
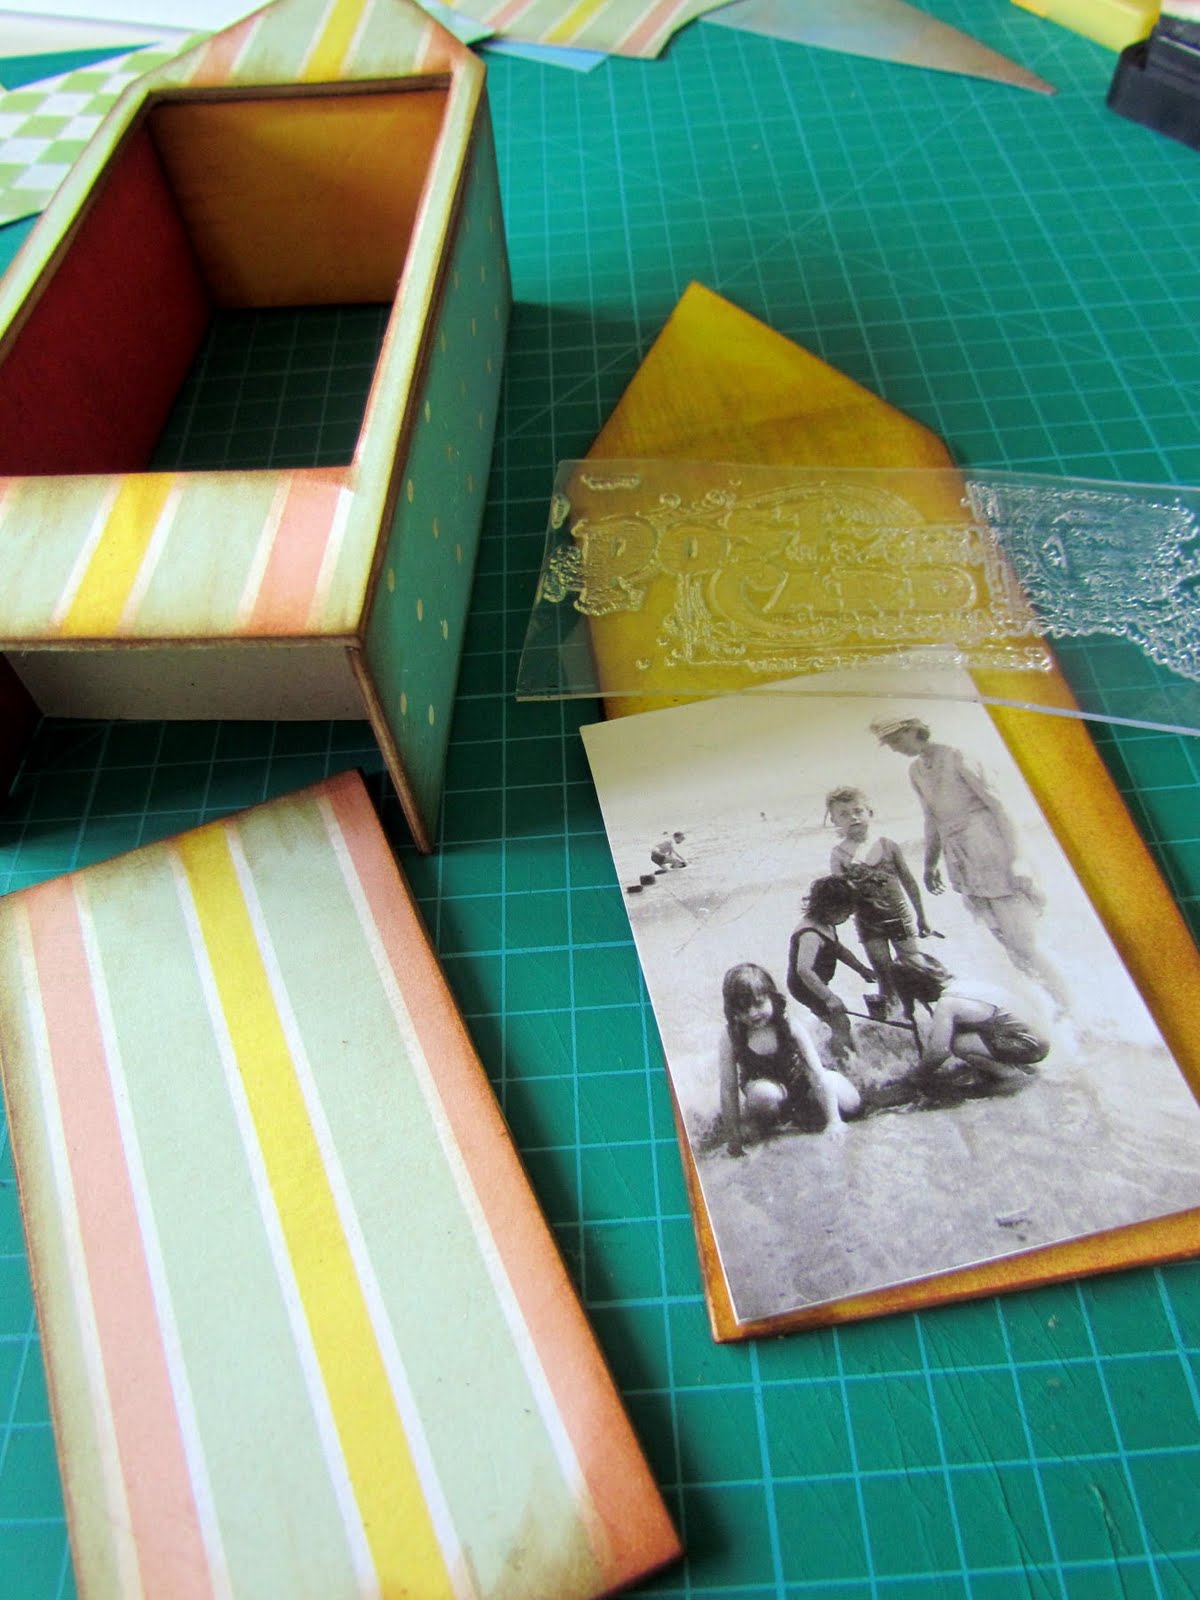

...then covered them with the yummy papers on both sides and started to construct. Before I attached the back of the hut I decorated the inside of the back panel with a Glitz stamp, my family photo and some material for texture.


After attaching the back of the hut I decorated the door and added a hinge down the left side made from a strip of patterned paper folded in half.


For the roof tiles I cut the green diamonds from the reverse side of the Carte postal paper, cut them in half and layered them up on the roof, adding the bunting cut from the paper layer to the front.


I added some little trinkets inside the hut and added a small step to the front finishing it all off with the cardstock sticker on the inside of the door. I hope you've enjoyed my little trip to the seaside. Next I'd like to introduce you to a very special man in my life ...


...My Dad! As it's fathers day this month we are celebrating the special fellas in our lives over at Glitz and the Love Games line fits perfectly with this rare photo of my dad not making a cheesy grin at the camera! Here's what I used;
Glitz Designs Love Games papers; polka, stripe, damask, floral
Glitz Designs Love Games cardstock stickers; titles and journalling
Glitz Designs Love Games paper layers
Glitz Designs Afternoon Muse glitzers
Glitz Designs Love Games whatnots
Glitz Designs teeny alphas; Burnt orange and cream
Glitz Designs Run on fancy frames


I started with a bit of distressing, well I would wouldn't I! and decided to go with the lovely black side of the Love Games floral paper as my base, adding in a little red insert with the polka paper to match the mount I created for the photo.


I built up layers of paper, paper pleats, rub ons and some hessian for texture.


My top tip when using the fabulous Glitz whatnots and stickers, if you only want to have a bit peaking out, cut them so you get the rest to use on another project.


Adding the teeny alphas (LOVE these!) for my title...


... I finished off the layout by circling the relevant words on the paper layer for my journalling. I think this layout will go on an easel on the side in my house, the Love games papes are so stylish and I want everyone to know how much I love my dad!

Thanks for letting me share my Glitzy projects with you and thanks for stopping by. I'll see you soon,until then Happy Crafting
Love
M x

Wednesday, 30 March 2011

A {Tweet} Froggity Blog hop!

Hi all

Well another month of 2011 gone and it means it's the Banana Frog blog hop time once again! With Spring in the air the theme for this month is birds and I hope you've been enjoying the {tweet} offerings from all the other froglets :) If you're here without hopping why not hop on over to the Lilly pad and start at the beginning to be inspired!

So without further ado here is my feathery offering for March ...


Is it a piece of wall art? is it an embellishment? or is it a bespoke brooch? ... the answer I think is all of the above! It's small and cute and oh so easy to make.

I used the Hiya Chick stamp set and the shake your tail feathers tadpole stamp set alongside some chipboard, music paper, gesso, distress inks, blonde moments embossing powder, small flowers and bling, some scrap paper and some craft wire. (by the way both stamp sets are on sale at the moment go grab a bargain!!)


Using the transparent image sheet in with the stamps I was able to draw out a template big enough to accommodate the bird on the branch and then cut this from a piece of chipboard.


I covered it in strips of music paper..


.... then trimmed it to shape and painted it with gesso.


I coloured it with distress inks ..


... and then stamped the end of the branch around the outside for a decorative pattern and embossed the bird. Some of the embossing powder stuck to the pattern I had stamped, a happy accident as I like the way it fills the branch out :)


Stamping the sentiment from the tadpole set ...


.... I then cut it up, inked it and added it to my collage along with some tiny paper flowers.


Leaving my collage aside to dry I made a wire cage to go over the top of my compositon. A little fiddly but worth the 'slightly' blue air in my studio LOL


I slipped the cage over the top of my chipboard collage...


...and attached the craft wire at the back with masking tape.


To finish off the back I glued some scrap paper onto it, trimming away excess with a craft knife and sanding any rough bits with a nail file


et voila, a cute little birdcage that could be used for anything you like!


I like it as a little wall plaque and think it would look great as a set of 3 but also think it would look great as an embellishment on a special card or scrap page and would look cool as a brooch by just adding a brooch pin to the back .... why not have a go and show me what you do with yours?

Thankyou for visiting my little corner of the lilly pad today your next hop stop is with the lovely and oh so talented Jo Firth Young and don't forget to leave comments where ever you go there may be prizes!

I hope you're well and happy and until soon Happy Crafting
Love
M x

PS My limited edition Art Tart DIY project CD's are available on my website see the post under this one for details and links ... why not try something different today :)

Thursday, 24 February 2011

With love from Glitz

Hi all
Today I'd like to bring you a bit of love from Glitz Designs as February is the month of love :) I was a very lucky girl this past valentines day and my wonderful hubby spoilt me rotten. We'd not long been back from our holiday to Mexico before valentines day and a couple of days later hubby was off on his travels again for 3 weeks so he decided to take control of the day and all I can say is the boy done good :) The lovely Glitz lines are perfect for all you love layouts and for this project love nest was perfect .... just like my valentines day ..


This is the list of Glitzy goodies I used
Glitz Designs Love nest papers; Sky, Damask and Floral
Glitz Designs Love nest rub ons
Glitz Designs Love nest What not
Glitz Designs Teeny alphas; Baby pink block and brown block.


I distressed the edges of the brown wrapping paper 12 x 12 and mounted my 3 photos on to some of the damask paper, distressing and creasing the edges for extra dimension as well as building them up in layers on foam pads.


I cut out some of the flowers and leaves from the floral paper to create embellishments, distressing and curling them into shape.


The large rose is one of the lovely what nots, to give it some movement I snipped into the leaves so I could lift them over the edges of the photos.


And the final touches were the journalling block from the what nots a couple of the pretty rub ons and my favourite, some teeny alphas. I'm glad I have a record of a wonderful day.

Now, I love my Husband and my family and of course my friends but the other two great loves of my life are these guys


My lovely furry best friends. Whatever happens in life, they always love me, they're great listeners, they make me laugh and are perfect for cuddling :) I love the colours in the Scarlett collection too and they were perfect for my layout, here's what I used;
Glitz Designs Scarlett papers; Polka, Bouquet and map.
Glitz Designs Scarlett Glitzers
Glitz Designs Scarlett Paper layers
Glitz Designs Love nest Cardstock stickers, titles
Glitz Designs Paisley flourish rub ons
Glitz Designs Vintage extras rub ons
Glitz Designs Teeny alphas black round


I distressed the base 12 x 12 paper and then really went to town distressing the map paper, ripping out the centre and rolling the paper back to create a frame.


I layered up papers and stickers


Added rubons to tie the layers together


And adhered the heart with foam pads to add some dimension to the layout, decorating it with the teeny alphas and the glitzers .... well a bit of bling is never out of place :)

I hope you've enjoyed my little Glitz love in and thanks for stopping by
Love
Mx

Tuesday, 31 August 2010

Scrapping then and now with Glitzy goodness

Hi all!
Today I want to share with you a couple of my Glitz layouts aswell as tell you a little story! Are you sitting comfortably? OK! let's begin ....


1951

I'm asked one crafty question quite a lot 'how long have you been scrapping' and I always say, as most crafters do, since I was little. This page is inspired by my first memory of a scrapbook aswell as the fabulous Glitz designs Vintage love collection. When I was a little girl I remember spending hours looking through a scrapbook my mum made when she was a little girl. I was fascinated by all the old photos and the bits of victorian scraps and pictures she included. Today as a grown up scrapper myself I still find the book a constant source of fascination and now have it scanned page by page on my hard drive!


This is the scanned page that the photo I have used in my layout comes from and I love it even more that my Nanny's hand writing is on it, that's why I like to use hand writing on my pages, I think it is as much of a memory as the photo for me.

So what Glitzy goodness did I use? From the Vintage love collection I used love letters, velvet, damask (reverse side) and polka patterned papers. I also used the numbers from Save the Date clear stamp set (Glitz stamps are just fabulous!) A Vintage Love What Not and a Vintage paper layer.


I built up the layers by ripping, tearing, distressing and inking my pp's and stamped the date. I then used a water brush to pull in the ink to fill the outlined numbers.


To make my elements I made a polka dot mat for my photo, inked a piece of doiley, distressed the WhatNot and roughly tore the butterflies from the paper layer. I like the shabby chic look of these torn butterflies and also that you can see the text from the paper layer.


Assembling the layout I curled the wings of the butterfly and added them on silicon for dimension along with some paper flowers...


...and some vintage lace and ribbon. I love the fact that I am now able to scrap my mums scrapbook thanks to modern technology and fabulous Glitz products.

And so moving on to the here and now!


All the fun of the Fair

Last week my sister and 2 beautiful nieces came to stay and I took them for a dayout to a theme park. We had so much fun I wanted to record the memory straight away and what better paper collection than Glitz Maya!

I used Maya navy (reverse side), stripe, polka and patchwork. I also added into the mix some Glitz pink frosting, some Detour cardstock alphas and some Plum crazy Alphas aswell as my favourite teeny alphas in pink block and black round.


As I'm sure you can imagine I had lots of photos of the day so decided to include lots of small ones in my layout while using the bright colourful ferris wheel photo as a base. The Maya patchwork paper is great for adding little touches of all the colours in the collection when it's cut up and I used the patterned rectangles as small corner mats for my photos.


These small mounted photos I added to the right side of the layout on foam pads for added dimension, aswell as adding my journalling to the top right corner and a line of the yummy pink frosting, which is super easy to use as all the gems are attached on a sticky strip!


Then I added my title using a mix of Glitz Alphas. I love how all the different styles and colours work together and are linked by the super fab teeny alphas! A bit of rainbow ribbon which fits perefctly with Glitz Maya, I think, and some bobbles finished off my colourful fairground layout.

Looking at these 2 layouts side by side I love that they mark a passage of time recording two very different days out and that I was able to reflect that artistically using two very different Glitz designs collections.

I hope you enjoyed my litle trip through scrapping then and now with Glitz designs. Thanks for stopping by and until soon Happy 'Glitzy' Crafting

Love
M x

Wednesday, 26 May 2010

From Glitz with {vintage} love


Lealholm

I recently took a trip to my parents house in North Yorkshire where I grew up and managed to take my camera out and take a few trips down memory lane. Lealholm is a small village in the middle of the moors and is somewhere I spent a lot of my time as a little girl. It's 'oldy wordly' and has changed little over time so I wanted to reflect that in my layout. The Vintage Love line from Glitz designs was the perfect choice for my project with a few glitzy exras thrown in for good measure!

Before I meander through my creative process I'll share with you my Glitzy shopping list:
Vintage love patterned papers; Velvet, Stripe, Damask, Polka
Vintage Love compass stamp
Vintage Love accents and stickers
Vintage Whatnots
Vintage paper layers
Teeny Alphas Brown Round
Paisley Flourish rub ons
Winged rub ons
I've added a few extras here and there from my own stash too.

I started by selecting my photos ... tough call as there were many :) and chose to convert 3 small photos into sepia leaving my main large photo in colour. I further distressed the photos with my trusty nail file and Vintage photo distress ink.


My base was the velvet paper, and I think it really does look like velvet! I love the fact that the Glitz papers are double sided and always try to show a little of the flip side if I can. I distressed the edges and stitched the frame with my sewing machine, a little distress ink took the white cotton down in colour and turning the page corner revealed the gorgeous pattern on the other side.


Taking a strip of the damask paper, and with a little more distressing :) I started to build up the layout background with the compass stamp and paper layers.


The polka paper made a perfect mat for my main photo. After the edges were distressed and inked I curled the edges of the paper up and inwards to create a strong focal point on the layout.


Now, I love detail, so I punched the sides of the Notes page from the pack of Whatnots as I knew I would use it for my journalling, what I didn't know was you wouldn't be able to see the detail once the layout was assembled LOL But I know it's there and thought it was a fun detail to share with you for future reference.


I started to piece the layout together and had to stop myself from using all the yummy elements I had out! I tend to be a more is more girl when it comes to my pages but even I have a limit LOL. It was at this point I realised my small photos needed a lift so I added them to some mats made from the stripe paper, distressed of course!


The Glitz paper layers are great fun and so different to anything out there, I used one page and cut the carnation from it making it into an embellishment and used a ripped piece of the text under the photo on the left side. A winged rub on added to some acetate and cut out, a card stock sticker distressed, a grunge board flourish inked, some lace and prima flowers created the rest of my embellishments.


And the finishing touches were an oversized paper clip I found on the floor in a car park ages ago! (washed of course :))


A small piece of a paisley rub on to the top left of the Damask strip and the oh so cute Glitz Teeny Alphas for my title.


I love dimension on my pages and lots of detail


and I {vintage} love my page of happy memories.

Thanks for taking this Glitzy trip with me and I hope you feel inspired to have a play with some Vintage love ... it is oh so yummy!

Until soon
Happy Crafting
Love
M x