Showing posts with label stamps. Show all posts

Sunday, 4 December 2011

A Black & wite Froggy Christmas

Hi all
Time to deliver a project of the day over at the Lily pad again. Some super simple but stylish black and white Christmas cards


As ever a more detailed post can be found on the Banana Frog blog.

Well it’s time for this froglet to hop off the lily pad I’m afraid. After much soul searching and juggling of time I have decided with great sadness after 2 ad 1/2 years it is time for me to step down from the Banana Frog DT and have said my fond farewells over at the Lilypad today.

Thanks for stopping by and hopping over to the Lily pad, I hope you're well and happy and until soon Happy Crafting
Love
M x

Tuesday, 4 October 2011

A spooky twist with Banana Frog

Hi all

Just a quicky to drop this off


My project of the day on the Banana Frog blog. A little spooky twist using the fairytale princess castle ... yes really :) Pop on over to the Lilly pad for my project.

I hope you're well and happy, see you Friday with 2 posts and until then Happy Crafting!
Love
M x

Sunday, 4 September 2011

Tweet and fluffy

Hi all
Today is my turn to share a pick of the day over on the Banana Frog Lilly pad. I decided to create some fun and fluffy cards this month


As ever the stpby steps can be found over on the Banana Frog blog .... enjoy!

Sorry this is fleeting, my old nemesis time seems to be getting the better of me at the moment but never fear ... I will win eventually and I'll be back to tell the tale :)

I hope you're well and happy, thanks for stopping by and until soon Happy Crafting
Love
M x

Friday, 2 September 2011

Anyone for Pimms with some added Glitz?

Hi all
Today it’s my turn to share some Glitz Design goodness with you so I thought I would create a couple of projects using up some of my scraps to make way for all the new Glitz goodies coming! My first project is


Anyone for Pimms?
A couple of weekends ago my husband took me to the Rewind 80’s festival in the beautiful Henley on Thames and we had the best time! I was transported back to my teenage years and had a ball singing my head off and dancing my wellies off to some great bands with 40,000 other people. We had a perfect British Sunday afternoon, the sun shone, the music was chilled out and the Pimms was fabulous. These pictures sum up my perfect weekend! As I said I used up lots of scraps all from the Afternoon Muse line;
Glitz Designs Afternoon Muse papers; Carte Postal, Polka, Block and Stripe
Glitz Designs Afternoon Muse embellishments; Peek-a-boos, Whatnots, Glitzers and Cardstock stickers titles and journaling
Glitz Designs Afternoon Muse clear stamps
Glitz Designs Teeny Alphas; Yellow block and Bubble gum pink


I built up lots of strips of papers across my base


Even cheating and using very thin scrappy bits as the bottom layer.


The Glitz Designs clear stamps are perfect for creating embellishments with scrap paper, and I did just that with the hot air balloon.


The Ferris wheel is cut from a Whatnot.


I layered up some of the cardstock stickers and Whatnots to add my journaling to and added the balloon on foam pads for dimension.


I attached the bunting peek-a-boo with a Glitzer at one end and the best day ever sticker at the other. My photos are on foam pads for dimension and the teeny alphas are perfect to finish of the title and journaling. Oh it really was a perfect day!

Talking of perfect the next layout is a picture of our grand daughter


Sophie Elizabeth
I love this photo of Sophie, it sums her up with that cheeky grin and makes us realise how quick she is growing up! I only used Laced with Grace for this layout and I think it’s a fun way to use up all my left over embellishments.
Glitz Designs Laced with Grace Paper; Rose, Floral and Butterflies
Glitz Designs Laced with Grace Embellishments; Paper layers, Whatnots, Glitzers, Peek-a-boos and Cardstock stickers Titles and Journalling.


I positioned the photo where I wanted it on the base paper, and then drew a rough circle around it, cutting it out of the paper with a craft knife.


I ripped around the circle and then tore back away from the edge, curling and folding the paper back. I then backed the hole with some of the floral paper and with a craft knife cut around some of the roses so I could slip my photo underneath them, kind of melding it into the paper.


I then gathered a whole host of embellishments with flowers on and set about cutting them up.


I arranged them around the frame, mixing up all the different textures and adding some on foam pads and Silicon gel for dimension. I cut a few butterflies from the paper, folding them up and curling the wings so they ‘settle’ on the flowers and added the bird Whatnot and a journaling sticker with a Glitzer to finish the piece off. I think this is a layout for an easel to put on display, so much more interesting than just a photo in a frame don’t you think?

I hope you have as much fun using up your scraps! Thanks for stopping by, I hope you’re well and happy and until soon as ever Happy Crafting
Love
MJM x

Thursday, 4 August 2011

Simply Clear scrapbook stamping

Hi all
Today is my turn to share a project of the day over on the Banana Frog blog and as promised I expanded on the card idea I created for the Frog hop last Saturday


I've taken it large on a scrap page! As ever the step by steps for the poject can be found at the Lily pad.

I hope you're all well and happy, life at Mogford towers is still super busy but very exciting (and keeps me out of mischief LOL) I have so much I need to catch you all up on and one of these days I will be true to my word and get back on track with this blogging malarkey!!

Until then nice to *see you*, stay safe and Happy Crafting
Love
M x

Saturday, 30 July 2011

Froggity blog hop!

Hi all

It's that time of the month when the froglets leap from their Lilypads and share some work with you on the Banana Frog blog hop. You can start at the beginning from the frog blog if you have just happened to visit, if you're here on the hop I hope you're having fun :)

This months theme is Summer so I made some summery cards to share with you ...


I like the clear fresh look of the acetate and love adding a splash of colour to acetate stamping with some alcohol inks.


Happy Days card


This is super simple. Using the Totally Tropical stamp set, add some different coloured stayzon to the large corner stamp and stamp twice onto your acetate. I really like mixing inks on my stamp to get a shaded, multi coloured image. Top tip, when stamping onto acetate get right over the top of your work and stamp straight down positively but not too heavy handed as the stamp will slide!


Stamp two title blocks from the Tropical Taste tadpole stamp set, again mixing the colours and then stamp the greeting from the Sentimental Style stamp set on to one of them. I have stamped two sentiment blocks so the one with the greeting will be for the front and the other one attaches to the inside behind it to cover up the glue marks, obviously it shows just plain white on the inside as the stamped side goes against the front block, but, as I have used gel glue to attach the sentiment for dimension it is quite nice to see the double stamped image. Hmmm I keep re reading this last bit .. does it make sense?? LOL


You are my sunshine card


Again another simple card but I think it has added impact with the alcohol ink. Using the Scribble Flowers stamp set, I stamped a pattern using black stayzon down one side of the card front.


Flipping the card over I then dropped on some alcohol inks in different colours and let it do it's own thing! While it dried (it doesn't take long!) I stamped the little sentiment block from the Build a Daisy stamp set, again I did this twice attaching one to the front and the other behind it


Flowers in Nature


And finally, a card that mixes a bit of all of them! I stamped the flowers from the Super Dreamy stamp set using several stayzon colours, Stamped the sentiment from Build a Daisy and finally added some butterflies from the Swirls and Butterflies stamp set. I then added some alcohol ink to the back of the sentiment area, letting it do it's own thing again and that was it, a striking card made simply :)

I hope you've enjoyed your visit with me on the blog hop and feel inspired to do some simply clear summer stamping, I feel inspired to take this to a larger project and am cooking up a layout for my Project of the Day on the 4th August so please check back then!

A lot of the froglets are very busy at the moment with summer holidays etc so this month is just a short hop, I will direct you back to the Lilypad to catch up on those you've missed or to peruse for added inspiration and don't forget to check the shop link to grab a sale bargain while you're there! thanks for stopping by and I'll see you soon, until then Happy Crafting
Love
M x

Monday, 4 July 2011

Happy Scrappy stamping!

Hi all.

I cannot believe how fast time is going again and that we are already in July! I've also been rubbish at keeping in touch with you all I know, life is super busy but very exciting though. I WILL get into a better routine and pop into my little corner of blogdom a bit more often .... honest :)

Ok, so today is my project of the day over at Banana Frog, inspired by a glorious summer morning I made a 'happy card'


As ever the step by steps are over on the Lily pad and all the stamps I have used are in the sale so why not grab yourself a bargain treat or two while you visit!

Talking of projects of the day I had a lovely email from a lovely lady from across the pond the other day. She owns a FAB website called All free Holiday crafts, there are loads of great projects over there and lots of inspiration for all manner of holidays and celebrations and all free! (I spent far too long having a happy trawl around over there!) Go and check it out, and while you're there see if you can spot this


My Project of the day that went live on the Lily pad on Xmas day last year. I was thrilled skinny (oh there's a dream way to lose weight LOL) and very flattered when she asked permission to use my project on the site, maybe some more will pop up :)

Things are good at Mogford towers, busy as I said and full of craftiness that I hope to share soon!

The boys are good too


It's been a while since they made an appearance here hasn't it, haven't they grown!

Plans are afoot to take my website off line soon to give it a much needed face lift and update and I really want to re decorate here too .... now if only my old nemesis Mr time would slow down a little maybe I'll actually get there!!!

Thanks for popping by, I hope you're all well and happy and until soon Happy Crafting

Love
M x

Tuesday, 28 June 2011

A {tweet} project

Hi all
Last month I had the pleasure of teaching at the Scrap-a-Mia retreat and loved being able to share some of the Glitz Designs papers from the Aftenoon Muse line with the delegates. This is what I created;


A scrappy piece of home decor.

When you look closely there are so many colours in the Afternoon Muse line we were able to mix things up a bit so everyone could have a colour scheme that suited them from lilac to peach!


We constructed the cage from mountboard, covering it in paint and stamps and the Glitz papers made the pop up frame in the centre which was double sided so it looks good from all angles.


With the addition of some elements sheets put together from old scraps and some handmade net flowers there was a veritable feast of birdcages to coo over.

Remember somtimes when you look at pattern paper really look at it to see what other colours are lurking and also don't always see it as a solid sheet of pattern, imagine small flashes of it within a project and you'll be surprised how different that one piece of paper can look!

Thanks for stopping by, I'll be back soon, until then Happy Crafting
Love
M x

Papers used;
Glitz Designs Afternoon Muse; Stripe, Banner and Polka

Sunday, 12 June 2011

July Craft stamper

Hi all

Just dropping by to let you know that the fabulous craft stamper magazine July issue is available now


It is packed with some lovely projects and loads of inspiration and oh yes a little project from me!!


It's an altered book special and is well worth getting hold of... happy reading :)

Lots of painty, doodly things going on in the art tart studio at the moment, plans are a foot and I can't wait to share them all with you, needless to say (while I keep you all in suspenders) I'm having a super, jolly, crafty time :)

I hope you're all well and happy, I'll be back soon, until then happy crafting
Love M x

Tuesday, 7 June 2011

A Glitzy Beach hut and a Glitzy dad!!

Hi all, for my Glitz offering this month I decided to swap one of my layouts for something a little different ....


Oh I do love to be beside the seaside!! And the fabulous Afternoon muse papers with a few other Glitzy bits from the other lines were perfect to create my little piece of summery home decor ... here's the ingredients;
Glitz Designs Afternoon Muse papers; Stripe, Polka, Floral, Block and Carte Postal
Glitz Designs Laced with Grace paper; plaid
Glitz Designs Afternoon Muse Glitzers
Glitz Designs Love Games Paper layers
Glitz Designs Love Games cardstock stickers - titles
Glitz Designs clear distressing stamps set 3


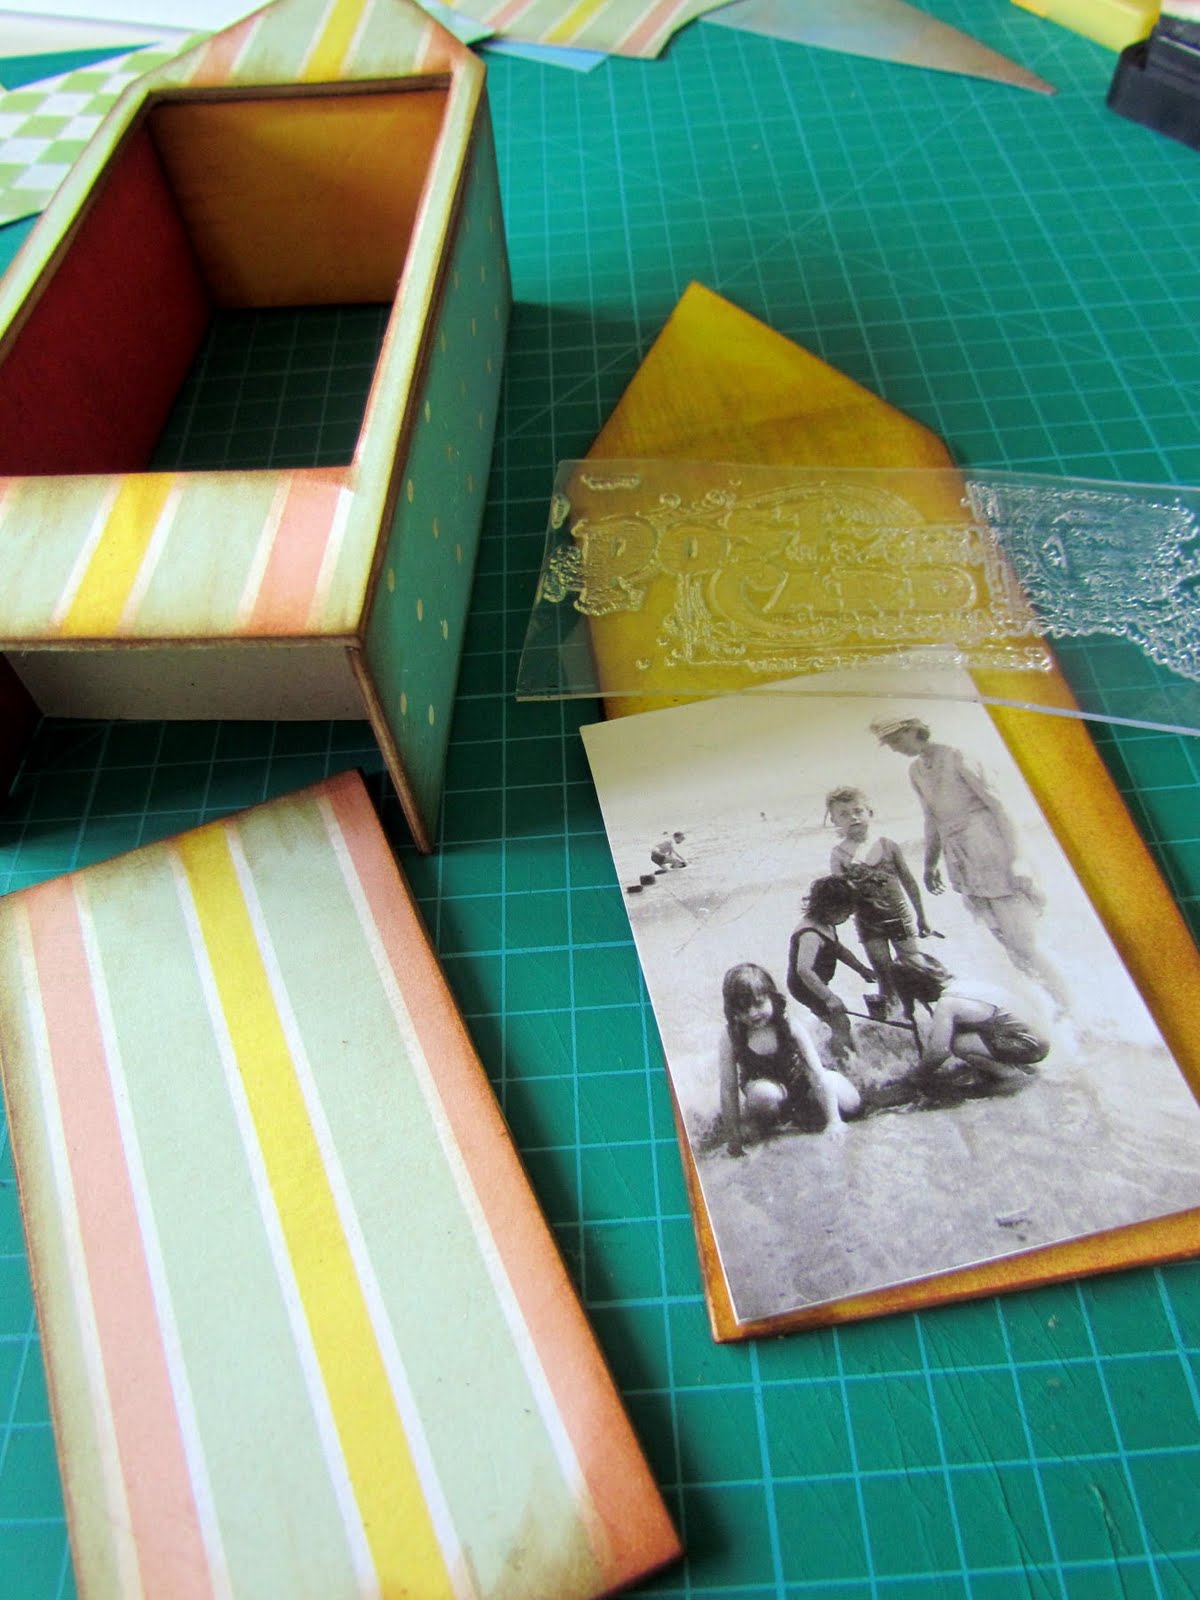
I cut out my pieces for construction from some chipboard...


...then covered them with the yummy papers on both sides and started to construct. Before I attached the back of the hut I decorated the inside of the back panel with a Glitz stamp, my family photo and some material for texture.


After attaching the back of the hut I decorated the door and added a hinge down the left side made from a strip of patterned paper folded in half.


For the roof tiles I cut the green diamonds from the reverse side of the Carte postal paper, cut them in half and layered them up on the roof, adding the bunting cut from the paper layer to the front.


I added some little trinkets inside the hut and added a small step to the front finishing it all off with the cardstock sticker on the inside of the door. I hope you've enjoyed my little trip to the seaside. Next I'd like to introduce you to a very special man in my life ...


...My Dad! As it's fathers day this month we are celebrating the special fellas in our lives over at Glitz and the Love Games line fits perfectly with this rare photo of my dad not making a cheesy grin at the camera! Here's what I used;
Glitz Designs Love Games papers; polka, stripe, damask, floral
Glitz Designs Love Games cardstock stickers; titles and journalling
Glitz Designs Love Games paper layers
Glitz Designs Afternoon Muse glitzers
Glitz Designs Love Games whatnots
Glitz Designs teeny alphas; Burnt orange and cream
Glitz Designs Run on fancy frames


I started with a bit of distressing, well I would wouldn't I! and decided to go with the lovely black side of the Love Games floral paper as my base, adding in a little red insert with the polka paper to match the mount I created for the photo.


I built up layers of paper, paper pleats, rub ons and some hessian for texture.


My top tip when using the fabulous Glitz whatnots and stickers, if you only want to have a bit peaking out, cut them so you get the rest to use on another project.


Adding the teeny alphas (LOVE these!) for my title...


... I finished off the layout by circling the relevant words on the paper layer for my journalling. I think this layout will go on an easel on the side in my house, the Love games papes are so stylish and I want everyone to know how much I love my dad!

Thanks for letting me share my Glitzy projects with you and thanks for stopping by. I'll see you soon,until then Happy Crafting
Love
M x

Saturday, 4 June 2011

Glue stick embossing!

Hi all, today it's my turn to share a project over on the Banana Frog Lilypad.


It's a technique based project using a glue stick for that distressed embossing look. Step by step photos are on the frog blog, so why not hop on over and take a peak and get creating with your glue stick!!

I hope you're well and happy, life has been busy in Mogford towers as usual but hopefully one of these days I will keep my promise to come back and have a chat ... you never know stranger things have happened :)

Until soon Happy Crafting
Love
M x