Showing posts with label glitzers. Show all posts

Friday, 9 December 2011

Happy Glitzy Christmas!

Hi all
Well it's that time again when I get to share some Glitzy goodness with you all from Glitz Designs and this month I've gone all festive :) 1st up is this layout ....


Santa Baby
A layout of our very cheeky grandaughter on Christmas day. I very rarely get a serious photo from her or her brother, but I love these photos they sum her up exactly. I wanted the layout to look like a present that was being unwrapped and the mix of elements from Beatiful Dreamer and Dance in sunshine with a little vintage blue thrown in for good measure gave me the fun festive look I wanted.
Here's what I used:
Glitz Designs Beautiful Dreamer paper; Floral, Polka, Stripe and Houndstooth
Glitz Designs Beautiful Dreamer embellishments; Giant Rhinestones and Epoxy words
Glitz Designs Dance in Sunshine paper; Polka, Floral, Damask, Stripe and Raindrop
Glitz Designs Dance in Sunshine embellishments; Glitzers, Epoxy words and Trim
Glitz Designs Vintage Blue; Glitzers
Glitz Designs teeny alphas; Mint Grunge
Glitz Designs frosting; red and black


I ripped around the edges of the paper to create a frame and pulled sections back to create the un wrapped present feel and then added Glitzers to some of the patterned paper to create presents for some of my embellishments.


The tree is made up of sevearl layers of different greens from the papers and the Giant Rhinestones make perfect shiny decorations.


And the reindeer and sleigh is an embellishment created with some paper piecing, placed hanging over the page so it looks like rudolph is flying overhead pulling his sleigh with some of the Dance in Sunshine trim:) I think this will make a fun piece of home decor for the festive season!

Next up is this layout...


First Snow
We had a hard winter last year and it was Olivers first winter, after the initial shock of landing in the snow he soon got the swing of it and loved it as much as his brother. The colours in the vintage blue collection were perfect for this layout and here's what I used;
Glitz Designs Vintage Blue paper; Stripe, Polka and Motif
Glitz Designs Vintage Blue embellishments; Titles stickers, Journalling Stickers, Epoxy words and Giant Rhinestones
Glitz Designs Teeny Alphas; Pearl


I kept this layout quite simple to focus on the picture and let the lovely colours of the paper do the work. After ripping strips across the layout, creating a curled photo mat and distressing liberally I added some splodges of acrylic paint with my fingers to create some snowy paw prints across my layout.


The fab stickers from titles and journalling added great accents to my page adding just enough detail and the Giant rhinestones give it an icy, blingy lift.


One little detail I love is the bottom corner that I ripped away to give a puppy chewed effect :)

And that's it for this post and also sadly for my time with the Glitz DT. I have had to do a lot of soul searching with my decision to step down from this amazing team but life has got busier and busier and unfortunately some things have got to give :(

I have been honoured and proud to be able to work along side such amazing designers over the last 2 and half years and of course it has been a complete pleasure to work with the gorgeous Glitz girls and their wonderful product. I may not be here every month but in my heart I will always be a Glitz girl and will continue to love all the gorgeous product they bring us.
Thanks to everyone for having me along for the ride and hopefully I will see you all in cyber space soon.
Much love
MJM x

Friday, 4 November 2011

My Glitzy nieces

Hi all it's that time again to share some gorgeous Glitzyness with you from Glitz Designs. This last week I have had my 2 nieces staying with me and of course I had to keep snapping away! The photos I have chosen to scrap really sum up their personalities and the Glitz embellishments let me write some meaningful aunty messages to them.
First up is Lilly ....


Completely be you always.
Lilly is such a unique, beautiful girl and I want her to always be exactly who she is, the hello kitty hat won out over a piece of Goth jewellery for instance on a shopping trip, I love the fact that she is an individual and proud of it. For the layout I used;
Glitz Designs patterned paper: Dance in Sunshine; Birds, damask, polka and raindrops
Glitz Deigns Dance in Sunshine; Trim, Epoxy Words, Paper Layers, Whatnots, Journalling stickers and Glitzers
Glitz Deigns Vintage Blue Peek a boos and Glitzers


By combining lots of strips of papers down the page I was able to use lots of the lovely paper, I love the green and lilac combo in this line with the pep of the yellow. I distressed the 2 circular whatnots to add an extra mat for the photo and added a glitzer for some extra bling. I love how the lines can cross over with their patterns and colours.


By lifting the photo on foam pads I was able to slot in the journaling block behind it, and a bird cut from a paper layer sits on top.


I love the new epoxy stickers, you can make up all sorts of sentiments with them in colours that all co-ordinate.


And lastly by adding the peek a boo from vintage blue onto some of the yellow paper I could make it take on a green hue to co-ordinate with my layout and this was my way to add my little message to Lilly

My next layout features Megan


KISYCMV
No I haven't spelt it wrong, this is Megans version of the kissing rhyme! She had us in stitches and it's just so Megan, there's no one like her! The 2 photos are the 2 sides of this complex, funny little girl.
Beautiful dreamer was the perfect line to tell the story and here is what I used;
Glitz Designs patterned paper: Beautiful Dreamer; Damask, Floral, Stripe, Polka and Toille.
Glitz Designs Beautiful Dreamer; Trim, Giant Rhinestones, Epoxy words and paper layers.
Glitz Designs Dance in Sunshine; Whatnots
Glitz Designs Vintage Blue clear stamps
Glitz Designs Teeny Alphas; Bubble gum pink


The spiral is cut from a paper layer and I only adhered it at the end so it has some movement. Strips of paper across the layout build up the background and again allowed me to use lots of the yummy colours.


I love the Pink and green in this line and used the bold pink stripe as mats for my photos to pop them off the page. The what not bunting from dance in sunshine is a perfect accent for my main photo and little word details added with the epoxy words work beautifully to tie everything together.


I created a journalling block from some of the ledger paper, punching it along the side. Adding some trim and a rhinestone added that extra bit of girlyness and the final touch is my little message to Megan in the form of the stamped heart from the Vintage Blue clear stamp collection .... I love Glitz stamps!

That's all from me for now, Thanks for popping by and letting me share my Glitzy projects with you.
I hope you're all well and happy and until soon Happy Crafting
Love
M x

Friday, 2 September 2011

Anyone for Pimms with some added Glitz?

Hi all
Today it’s my turn to share some Glitz Design goodness with you so I thought I would create a couple of projects using up some of my scraps to make way for all the new Glitz goodies coming! My first project is


Anyone for Pimms?
A couple of weekends ago my husband took me to the Rewind 80’s festival in the beautiful Henley on Thames and we had the best time! I was transported back to my teenage years and had a ball singing my head off and dancing my wellies off to some great bands with 40,000 other people. We had a perfect British Sunday afternoon, the sun shone, the music was chilled out and the Pimms was fabulous. These pictures sum up my perfect weekend! As I said I used up lots of scraps all from the Afternoon Muse line;
Glitz Designs Afternoon Muse papers; Carte Postal, Polka, Block and Stripe
Glitz Designs Afternoon Muse embellishments; Peek-a-boos, Whatnots, Glitzers and Cardstock stickers titles and journaling
Glitz Designs Afternoon Muse clear stamps
Glitz Designs Teeny Alphas; Yellow block and Bubble gum pink


I built up lots of strips of papers across my base


Even cheating and using very thin scrappy bits as the bottom layer.


The Glitz Designs clear stamps are perfect for creating embellishments with scrap paper, and I did just that with the hot air balloon.


The Ferris wheel is cut from a Whatnot.


I layered up some of the cardstock stickers and Whatnots to add my journaling to and added the balloon on foam pads for dimension.


I attached the bunting peek-a-boo with a Glitzer at one end and the best day ever sticker at the other. My photos are on foam pads for dimension and the teeny alphas are perfect to finish of the title and journaling. Oh it really was a perfect day!

Talking of perfect the next layout is a picture of our grand daughter


Sophie Elizabeth
I love this photo of Sophie, it sums her up with that cheeky grin and makes us realise how quick she is growing up! I only used Laced with Grace for this layout and I think it’s a fun way to use up all my left over embellishments.
Glitz Designs Laced with Grace Paper; Rose, Floral and Butterflies
Glitz Designs Laced with Grace Embellishments; Paper layers, Whatnots, Glitzers, Peek-a-boos and Cardstock stickers Titles and Journalling.


I positioned the photo where I wanted it on the base paper, and then drew a rough circle around it, cutting it out of the paper with a craft knife.


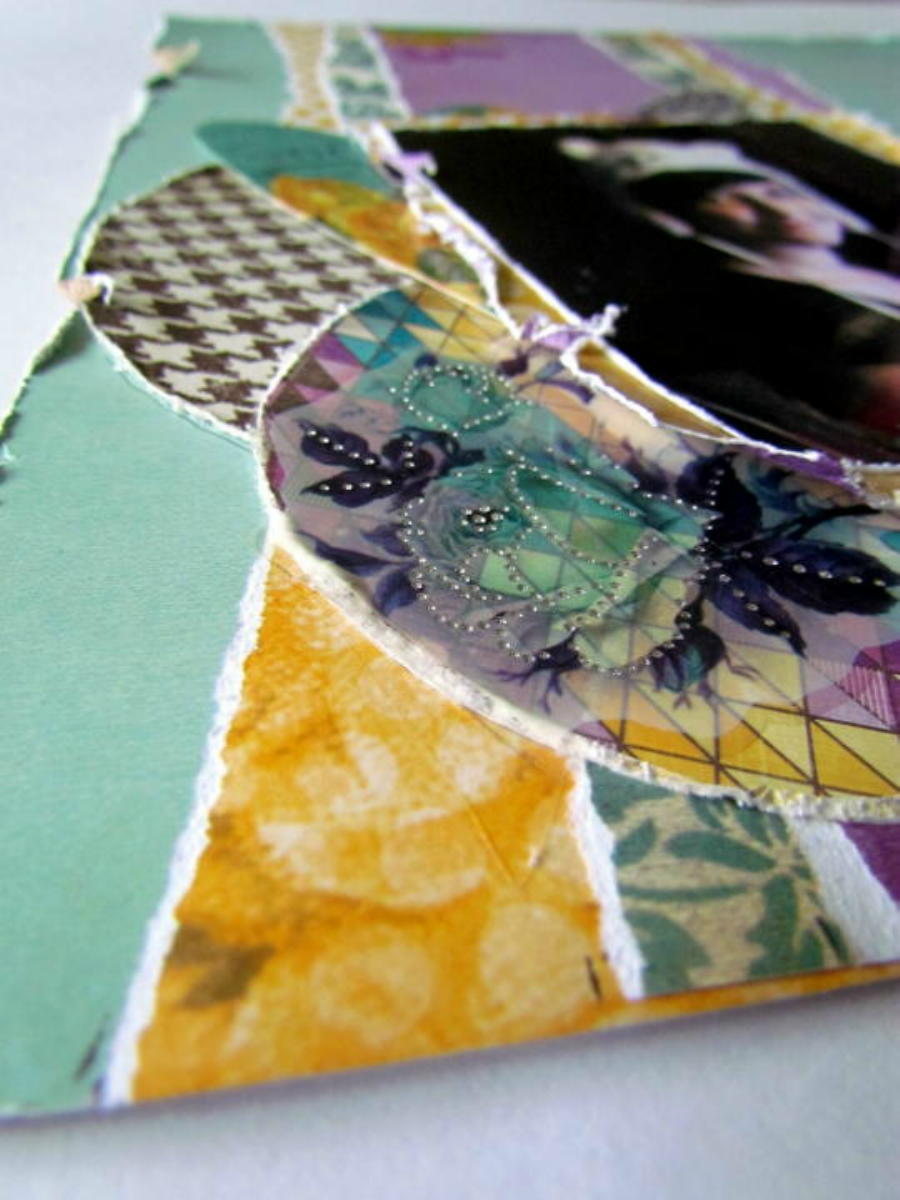
I ripped around the circle and then tore back away from the edge, curling and folding the paper back. I then backed the hole with some of the floral paper and with a craft knife cut around some of the roses so I could slip my photo underneath them, kind of melding it into the paper.


I then gathered a whole host of embellishments with flowers on and set about cutting them up.


I arranged them around the frame, mixing up all the different textures and adding some on foam pads and Silicon gel for dimension. I cut a few butterflies from the paper, folding them up and curling the wings so they ‘settle’ on the flowers and added the bird Whatnot and a journaling sticker with a Glitzer to finish the piece off. I think this is a layout for an easel to put on display, so much more interesting than just a photo in a frame don’t you think?

I hope you have as much fun using up your scraps! Thanks for stopping by, I hope you’re well and happy and until soon as ever Happy Crafting
Love
MJM x

Tuesday, 19 July 2011

Happy July with Glitz Designs

Hi all,
Well it’s that time again to share some Glitzy goodness with you with some Glitz Designs loveliness.

July is one of my favourite months, it holds so many memories for me as it’s the month that the long school holidays start and it’s my birthday month so I wanted my projects to sum up those feelings ....


40 years on

I hardly recognise this little person, but it is one of my favourite pictures of me and makes me smile, I realised it is now 40 years since it was taken, oh my life!! And I thought it would be interesting to see what I would say to that younger me knowing what I know now so created this layout with some hidden journaling to hold my message.

I have mixed up the collections for this one and this is what I used
Glitz Designs Love Games papers; score card and polka
Glitz Designs Laced with Grace papers; polka, floral and stripe
Glitz Designs Afternoon Muse paper; polka
Glitz Designs Teeny alphas; apple green block, pink block, yellow block and burnt orange
Glitz Designs Laced with Grace Whatnots
Glitz Designs Laced with Grace paper layers
Glitz Designs Afternoon Muse peek-a-boo
Glitz Designs Love Games clear stamp set
Glitz Designs Afternoon Muse clear stamp set
Glitz Designs Save the Date clear stamp set


I started by laying down a rough block of colour in the centre of the score card paper with some distress ink to create a base to lift my design...


...Then built up a collage of distressed circles to reflect the circle of the date stamp and to introduce all the happy colours from the papers. I also put my photos through a cartoon effect and printed them onto some mat paper, a fun effect that lends to the retro story I am telling.


I added some foam tape around three edges of my ‘now’ photo to adhere it to the page, leaving the right side open to slip in my hidden journaling.


I love the sentiment on the Laced with Grace paper layer but it was too big for my layout in its entirety so I cut some word strips from it ....


.... then added in the missing words with the teeny alphas. I love mixing up typesets and these teeny alphas are not only one of my favourite Glitz products but quite possibly one of my most favourite products ever! I love the colours.


Finally I stamped the Hello stamp at the top of a strip of card and fold it concertina style to slip in behind my ‘now’ photo. This is where my hidden message to the younger me lives.


This layout will live on an easel on my side for a while, I love its happiness with all the colours and I love the message it speaks to me.

So with the summer holidays round the corner over here in the UK and all my memories of long days playing in the back garden with the paddling pool and trips to the seaside I really smiled when I saw this photo of my cousins two little ones sitting in their sandpit in the sun, I love the candied shot.


Happy Life

I used;
Glitz Designs Laced with Grace papers; stripe, polka and plaid
Glitz Designs Afternoon Muse papers; block, stripe and banner
Glitz Designs Afternoon Muse paper layers
Glitz Designs Afternoon Muse cardstock stickers; titles
Glitz Designs Afternoon Muse Whatnots
Glitz Designs Afternoon Muse Glitzers
Glitz Designs Laced with Grace cardstock stickers; titles


I took some bright yellow paint and splattered the middle of my base paper, adding ‘sunshine’...


....And started building up layers of paper as a base for my photo. I created a paper ribbon with some of the Afternoon Muse block paper by folding a strip backwards and forwards along its length and when adhering allowing sections of it to stand free.


The clown from the what not was perfect as an accent at the corner of my collage so I cut him free and adhered him to the end of the follow your bliss title sticker.

The Glitzers were perfect for finishing off my layout as was one of the banners cut from the banner paper, while the ferris wheel cut from the paper layer finished of the happy fun fair feel of my page.

I hope July is a happy month for you too, thanks for stopping by and until soon Happy Crafting
Love
M x

Tuesday, 7 June 2011

A Glitzy Beach hut and a Glitzy dad!!

Hi all, for my Glitz offering this month I decided to swap one of my layouts for something a little different ....


Oh I do love to be beside the seaside!! And the fabulous Afternoon muse papers with a few other Glitzy bits from the other lines were perfect to create my little piece of summery home decor ... here's the ingredients;
Glitz Designs Afternoon Muse papers; Stripe, Polka, Floral, Block and Carte Postal
Glitz Designs Laced with Grace paper; plaid
Glitz Designs Afternoon Muse Glitzers
Glitz Designs Love Games Paper layers
Glitz Designs Love Games cardstock stickers - titles
Glitz Designs clear distressing stamps set 3


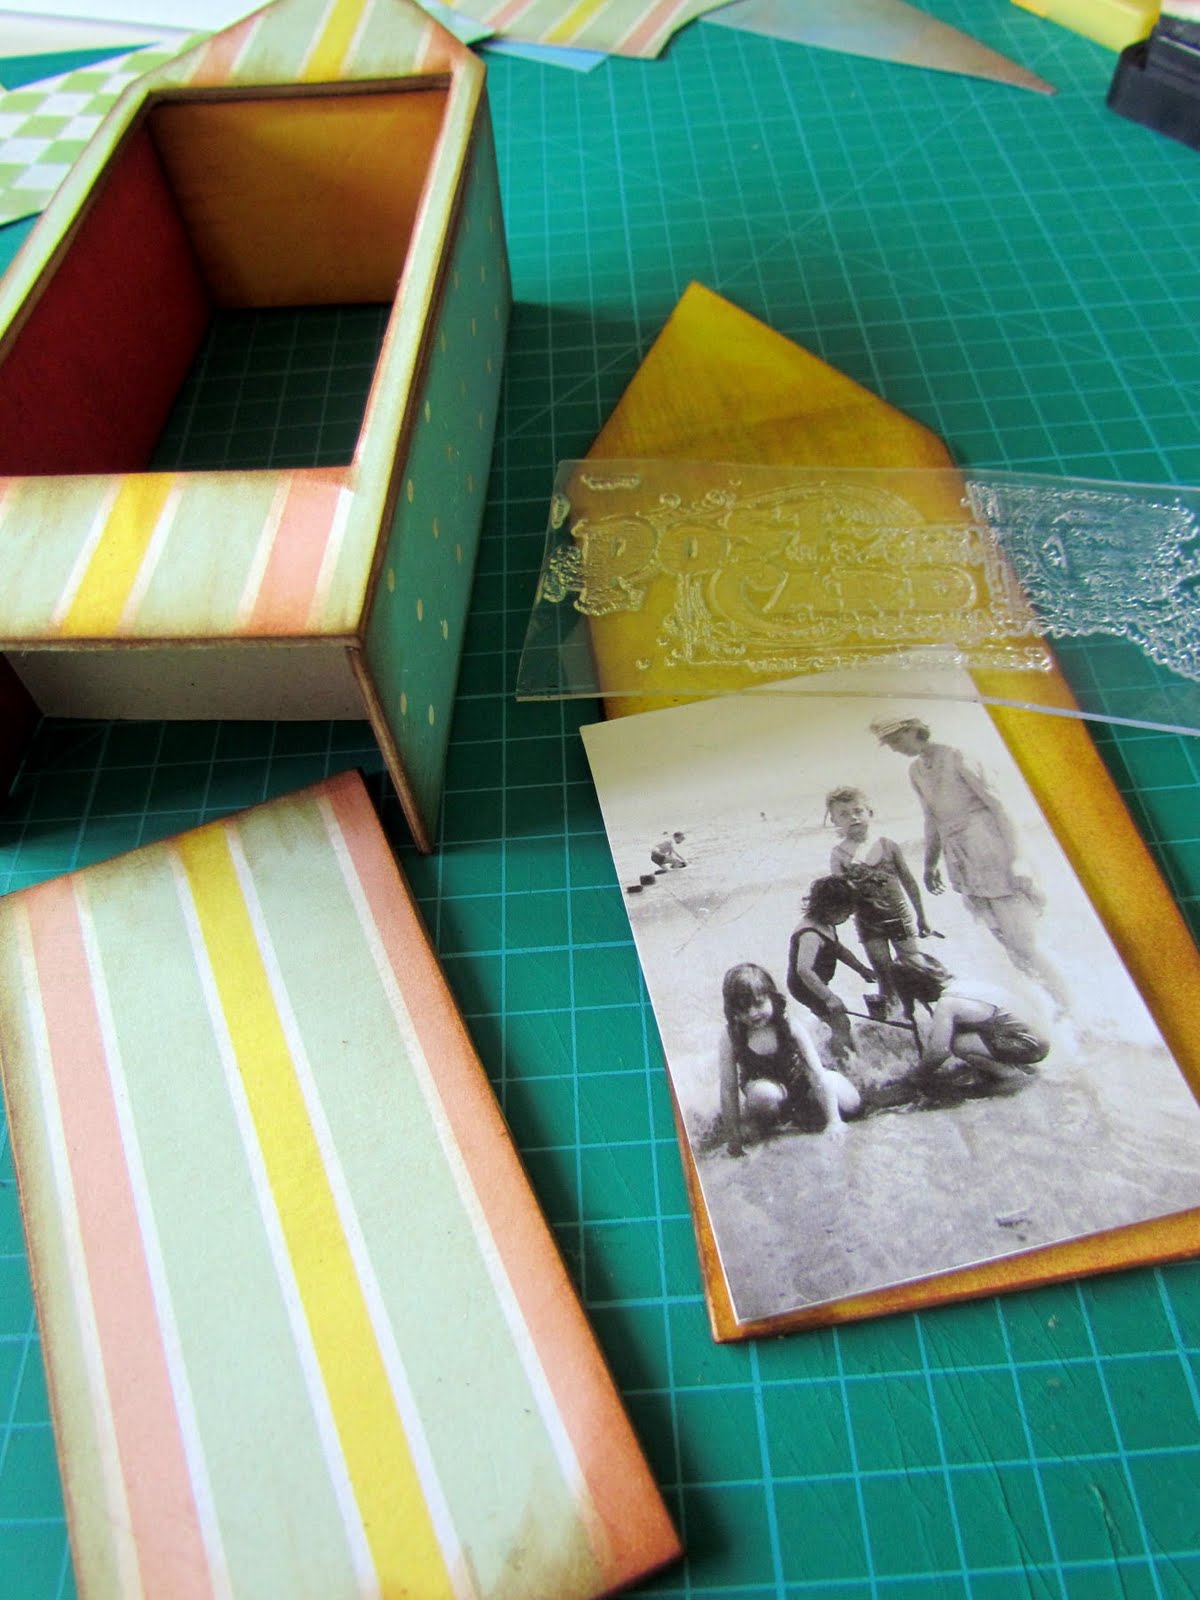
I cut out my pieces for construction from some chipboard...


...then covered them with the yummy papers on both sides and started to construct. Before I attached the back of the hut I decorated the inside of the back panel with a Glitz stamp, my family photo and some material for texture.


After attaching the back of the hut I decorated the door and added a hinge down the left side made from a strip of patterned paper folded in half.


For the roof tiles I cut the green diamonds from the reverse side of the Carte postal paper, cut them in half and layered them up on the roof, adding the bunting cut from the paper layer to the front.


I added some little trinkets inside the hut and added a small step to the front finishing it all off with the cardstock sticker on the inside of the door. I hope you've enjoyed my little trip to the seaside. Next I'd like to introduce you to a very special man in my life ...


...My Dad! As it's fathers day this month we are celebrating the special fellas in our lives over at Glitz and the Love Games line fits perfectly with this rare photo of my dad not making a cheesy grin at the camera! Here's what I used;
Glitz Designs Love Games papers; polka, stripe, damask, floral
Glitz Designs Love Games cardstock stickers; titles and journalling
Glitz Designs Love Games paper layers
Glitz Designs Afternoon Muse glitzers
Glitz Designs Love Games whatnots
Glitz Designs teeny alphas; Burnt orange and cream
Glitz Designs Run on fancy frames


I started with a bit of distressing, well I would wouldn't I! and decided to go with the lovely black side of the Love Games floral paper as my base, adding in a little red insert with the polka paper to match the mount I created for the photo.


I built up layers of paper, paper pleats, rub ons and some hessian for texture.


My top tip when using the fabulous Glitz whatnots and stickers, if you only want to have a bit peaking out, cut them so you get the rest to use on another project.


Adding the teeny alphas (LOVE these!) for my title...


... I finished off the layout by circling the relevant words on the paper layer for my journalling. I think this layout will go on an easel on the side in my house, the Love games papes are so stylish and I want everyone to know how much I love my dad!

Thanks for letting me share my Glitzy projects with you and thanks for stopping by. I'll see you soon,until then Happy Crafting
Love
M x