Tuesday 31 August 2010

Scrapping then and now with Glitzy goodness

Hi all!
Today I want to share with you a couple of my Glitz layouts aswell as tell you a little story! Are you sitting comfortably? OK! let's begin ....


1951

I'm asked one crafty question quite a lot 'how long have you been scrapping' and I always say, as most crafters do, since I was little. This page is inspired by my first memory of a scrapbook aswell as the fabulous Glitz designs Vintage love collection. When I was a little girl I remember spending hours looking through a scrapbook my mum made when she was a little girl. I was fascinated by all the old photos and the bits of victorian scraps and pictures she included. Today as a grown up scrapper myself I still find the book a constant source of fascination and now have it scanned page by page on my hard drive!


This is the scanned page that the photo I have used in my layout comes from and I love it even more that my Nanny's hand writing is on it, that's why I like to use hand writing on my pages, I think it is as much of a memory as the photo for me.

So what Glitzy goodness did I use? From the Vintage love collection I used love letters, velvet, damask (reverse side) and polka patterned papers. I also used the numbers from Save the Date clear stamp set (Glitz stamps are just fabulous!) A Vintage Love What Not and a Vintage paper layer.


I built up the layers by ripping, tearing, distressing and inking my pp's and stamped the date. I then used a water brush to pull in the ink to fill the outlined numbers.


To make my elements I made a polka dot mat for my photo, inked a piece of doiley, distressed the WhatNot and roughly tore the butterflies from the paper layer. I like the shabby chic look of these torn butterflies and also that you can see the text from the paper layer.
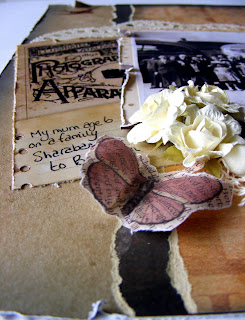

Assembling the layout I curled the wings of the butterfly and added them on silicon for dimension along with some paper flowers...


...and some vintage lace and ribbon. I love the fact that I am now able to scrap my mums scrapbook thanks to modern technology and fabulous Glitz products.

And so moving on to the here and now!


All the fun of the Fair

Last week my sister and 2 beautiful nieces came to stay and I took them for a dayout to a theme park. We had so much fun I wanted to record the memory straight away and what better paper collection than Glitz Maya!

I used Maya navy (reverse side), stripe, polka and patchwork. I also added into the mix some Glitz pink frosting, some Detour cardstock alphas and some Plum crazy Alphas aswell as my favourite teeny alphas in pink block and black round.


As I'm sure you can imagine I had lots of photos of the day so decided to include lots of small ones in my layout while using the bright colourful ferris wheel photo as a base. The Maya patchwork paper is great for adding little touches of all the colours in the collection when it's cut up and I used the patterned rectangles as small corner mats for my photos.


These small mounted photos I added to the right side of the layout on foam pads for added dimension, aswell as adding my journalling to the top right corner and a line of the yummy pink frosting, which is super easy to use as all the gems are attached on a sticky strip!


Then I added my title using a mix of Glitz Alphas. I love how all the different styles and colours work together and are linked by the super fab teeny alphas! A bit of rainbow ribbon which fits perefctly with Glitz Maya, I think, and some bobbles finished off my colourful fairground layout.

Looking at these 2 layouts side by side I love that they mark a passage of time recording two very different days out and that I was able to reflect that artistically using two very different Glitz designs collections.

I hope you enjoyed my litle trip through scrapping then and now with Glitz designs. Thanks for stopping by and until soon Happy 'Glitzy' Crafting

Love
M x

Wednesday 25 August 2010

Lighting up a blizzard

Hi cyber buddies it's project of the day day today over at the Lily pad and here is my project


Lighting up a blizzard

A super easy and simple project using one of my favourite Banana Frogstamp sets Blizzard, my purple cows hot laminator and some pound shop fairy lights!! ( I love a crafty bargain!) Go and check out the step by steps here and remember it's not just for Christmas LOL

I hope you're all well and happy, thanks for stopping by and until soon as ever Happy Crafting!

Love
M x

Saturday 21 August 2010

Inspiring, Inspiration!

Hi all, it's the simple things project day over at it's a creative world, our year long project with a new word to work with every month. Todays word is inspiration and here is my offering.


An altered jewellery box that is triple embossed with some grungeboard wings and inside


a concertina displaying a collection of my inspirational photos from Mexico.

There is a step by step in the post over there to make this super easy but effective little box of gorgeousness and of course while you visit you can be inspired by the rest of the creative girls :)

Today I am at Bee Crafty doing a workshop and we are making my inspirational carousel ... so yes all of those that have asked for it I am finally putting a DIY project together for it too :) And tomorrow I will be doing some show prep for my Serif show on Create and Craft on Monday but I'll be back soon!

I hope you're all well and happy and until soon Happy Crafting!
Love
M x

Monday 16 August 2010

Focus on colour in Black and white

Clear as mud? maybe this will help ...


Hi all! This is my offering over at It's a creative world for today. A super easy but effective way to add a twist to your photos, go and check out my post to see how I did this easily and simply in a word document.


Although in the post over there I have said you don't need any fancy programme to do this effect in, I resisted the temptation to do it in my serif digital scrapbook artist 2 programme until I know you've all got it LOL and you can get it tomorrow at an absolute steal, basically getting a digi collection of 10 kits with it for free so why not join me tomorrow 17th August on create and craft and ideal world TV at 9am and 12 noon ... not sure which channel comes first as I post this, but you get the idea :) See you there!

Thanks for stopping by, I hope you enjoy the inspiration over at it's a creative world and until soon Happy Crafting!

Love
M x

Friday 6 August 2010

If in doubt ... cut it out!

Hi all!
It's my turn to share some Glitzy goodness with you today.


Dance to your own tune

My mum took this picture of my niece in a Goth shop recently and as soon as I saw it I knew that the Glitz designs Distresed Couture collection would go with it perfectly!
I used Distressed Couture vines, blocks, scrolls, glitzers, rub ons, journalling cardstock stickers,Black fleur de lis rub ons, fancy frames rub ons and red & black frosting

Because the photo was taken in a shop there is a bit of background 'noise' that I didn't want..


Now I know there are fab photo programmes that you can use to repair such things but why not just cut out the photo with a pair of good old fashioned scissors? You can get some interesting shapes to play with and spark new ideas too!


I laid it up on to some of the the vines paper that I knew would match the dress perfectly and added a mat of the news print paper behind the photo top lift it


and to lift it further added the corner of the fleur de lis rub on behind it, these large squares of rub ons are so useful!


A fancy frame rub on was added behind the image for that goth accent and I filled it with the butterfly rub ons. The Love glitzer was perfect but I only wanted red and black bling on the layout so I coloured the little gems set into the sticker (such a clever idea!) with a permanent pen. I added some lace, safety pins and a flower head from a cheap spray of flowers I picked up!


The tattoo type rub on was a perfect accent for the page as were the red and black frosting strips that I used to create my own flourish shapes.


Finally a few scraps of distressed couture papers, a safety pin and a cheap metal silver charm coloured with permanent markers pulled the layout together.

So now you know what I mean by 'if in doubt ... cut it out!' and so I thought I would take it a step further for the next layout!!


Megan Scarlet and Winston

This is my other niece and this picture makes me smile! The Kismet collection matched the photograph colours brilliantly. This is what I used; Kismet dots, ledger, numbers, floral, rub ons, glitzers, accent stickers. Teeny alpha red block, vintage paper layers and Hot mama alphas.

Again the photo didn't have a great background so I cut Megan out.


I decided to make this a collage page and set about cutting out cloud shapes and a rainbow from the papers. I used china blue distress ink to add to the 'cartoon feel' of the pieces and did my favourite thing with the glitzers and rub ons by adding them to some acetate to cut out.


I layered up all the elements, cut out the balloon from the paper layer and added some white doodling to lift everything from the page.


I had run out of a couple of the alphas so I cut the outline from the sticker sheet, using the negative as my missing letters and I just love the teeny alphas!!


I layered up the glitzers and rub ons I cut from the acetate onto foam pads for added dimension and that's it a page that makes me smile!

Now you can take this cutting out photos thing a stage further if you wish ... I love to make paper dolls...

a layout of the Glitzy girls I did a while ago (using the Maya collection)... but you don't have to go this far if you don't want to LOL!

Thanks for stopping by, I'm now tapping my fingers on the table eagerly awaiting my new glitzy goodies, how about you?
I'll see you soon, until then Happy Crafting!
Love
M x

Designer Friday at the Ranch!

Hi all! I'm here to share some purple goodness with you on this lovely day as it's my turn on Designer Friday over at Purple Cows

As some of you may know I've recently been proud and honoured to have been presenting Purple Cows tools on create and craft TV. I've been busy beavering away making samples for these shows and one of my fave raves at the moment are these..


Laminated bags! Oh they are so super easy with the Purple Cows Hot/Cold laminator and my trusty Purple Cows 2 in 1 trimmer!


Of course the beauty of the Purple Cows Hot pockets that go alongside the laminator is that they come in all the crafting sizes and the 12 x 12 Hot pockets are perfect for using your scrapbook papers in a different way! These DeLovely Cosmo Cricket papers are just that and I think they deserve to be shown off, what better way than as a bag! The pockets on the front are made from the 6'' x 4'' Kool pockets, super strong (held on there with Helmars glue!) and the perfect size for my bag (they also enabled me to get more of that paper on display :))

The front and back are 12 x 12 hot pockets, filled with the paper and the side and base are 3 3''x 12'' strips of paper put into 2 12 x 12 hot pockets and then trimmed into strips with the fabulous Purple cows guillotine. The whole thing is then put together with eyelets (I used a crop-a-dile), a bit of ribbon attached for the handles and then you're good to go! The lamination with the Purple Cows laminator and Hot pockets is super strong and believe me these bags are sturdy!

So then I was playing with some digi scrapping ....


How cool! a completely unique beach bag with my own photo on it!!


and then go small with the 8 x 8 Hot pockets and an 8'' x 8'' digi scrap page. Don't you think these would make great gift bags??

So why not see what you can create with your Purple Cows laminator and Hot pockets, think outside the box, get those papers out of the album and create some purple gorgeousness of your very own :)

Thanks for stopping by , pop back often to the pasture to be inspired by the oh so talented cow girls and don't forget that all the projects generated by the girls are available as FREE PDF downloads, just follow the links to scribd. If you're stuck for inspiration let us help you out!!

I'll see you soon, until then Happy Crafting!
Love
M x

Wednesday 4 August 2010

A froggy sketch

Hi all
It's sketch day, part one, over at the lilly pad. Every month the froglets either have a sketch to work with or a colour inspiration, this month is a sketch and this is my offering


Pop on over to the lilly pad to see how the other froglets have interpreted it, that's the great thing with sketches everyone works with them differently!

My layout is a photo of hubby in Xcaret ecological park in our beloved Mexico and quite aptly I have used The totally tropical stamp set and the tropical taste tadpole set alongside the oh so cute DeLouisville tadpole set.


I created my own paper with a piece of 12 x 12 and a big and juicy stamp pad in vibrant primaries.


I then stamped a thin strip of this with flowers from the tropical taste tadpole set and the top of a big strip with flowers from the totally tropical set.


I then layered up contarsting Rose Moka papers and positioned some of the stamps to work out their positions. This is a great trick with acrylic stamps so you can get an idea of how things are going to look.


I then stamped an embellishment of the large flower corner in totally tropical on to some white card using the big and juicy vibrant primary ink pad to tie the layout together, cut it outand added it on foam pads for dimension as well as stamping out the title block with the same ink pad and using the DeLouisville alphas for the title, don't they fit perfectly?!


and lastly I stamped a journalling block from the tropical stamp sets to record my memory of the day.

And that's it my version of this months sketch over at Banana Frog, I love making my own papers with my ink pads, why don't you have a play too?

Thanks for stopping by and I'll see you soon (at the moment I am somewhere up the Baltics having a fabulous time, I hope, bobbing about on a cruise ship) Until then Happy Crafting!
Love M x