Sunday 30 May 2010

Froggity Blog Hop!

Blimey O'Reily can you believe this has come round again? Where did the last month go?? And I'm sure Bev at Froggie HQ is wondering where the last 4 years went as she celebrates 4 years of gorgeous Froggie-ness!

So, it is the monthly frog hop from Banana Frog, (clicking on that link will take you to the list of blogs if you've missed out so far!) So without further ado, and with that darn Stevie Wonder song stuck in my head! lets wish Banana Frog HAPPY BIRTHDAY (or maybe that should be hoppy birthday :))

Predictable I know, but I made a Birthday card, but not just any birthday card, a Kool laminated, hidden message floating in mid air type card :)


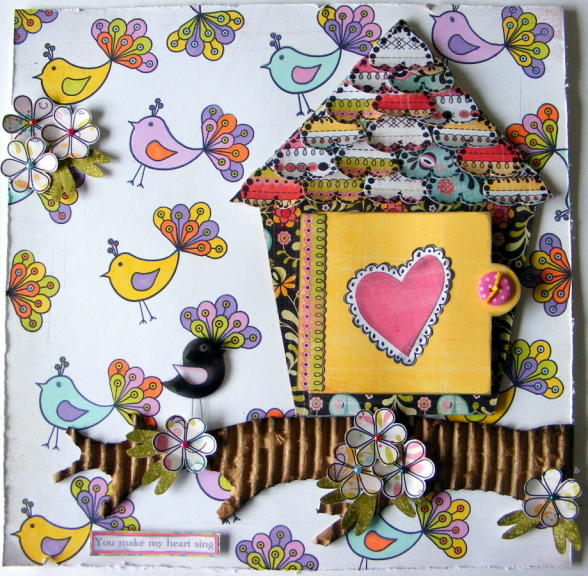
This is the front and you will just have to go through the post to see the inside LOL


So first up, one of my favourite things to do with my stamps, as I've said before, making my own patterned paper! A birthday party isn't complete without cake so I started with the 2 small cup cakes from Cupcake Greetings stamped randomly on to some thin white card.


Next, an addition of polka dots stamped with green and pink neon ink using the small dot from Make a Chain, an oh sooooo useful stamp set!


Pro markers at the ready my PP is coloured in.


The alphas for my card come from the Budmo Jiggler stamp set (love that name!) and Steel Fish ouline. I stamped the Budmo Jiggler alphas with lime brilliance inks and coloured in the dots with a yellow pro marker ... hmmmm looks like a certain logo LOL (and hands up at this point that was a complete accident!)


And what party is complete without balloons? Can you guess which stamp set I used? ... the balloons come courtesy of the Retro Baubles stamp set and that lovely neon ink again :)


To assemble, I cut 2 strips of matting and layering that would fit inside my Purple Cows Kool laminator pockets, cutting the front at 5'' and the back at 6'' so the front strip would take the HAPP and the Y fitted at the end of the back strip ... why?.....


So when it's opened the Y completes the message inside the card, and that's when you get to see the 'balloons' in all their glory :)

A couple of eyelets and some colourful ribbon forms the hinge of the card. I love the way it looks like the card is 'floating' in the laminated pockets and love that I can use my Banana Frog stamps not only to create my embellishments and alphas but also that I can create my own paper to fit an occassion!

So what will you create when you win one of the £100 giveaways over at Banana Frog? Today is the last chance to enter so what are you waiting for? Leave a comment on the frog blog here for the chance to win £100 of stamping goodness and while you're at the Lily pad why not shop? That way you automatically get entered into ANOTHER £100 giveaway ... shimples! Go on you know you want to!

Ok so you have your entries in to win some goodies... what now? Well after leaving a comment on this post for the chance of winning a free stamp set of your choice!! hop on over to the lovely and oh so talented Antheas blog to see what stamping goodness she has to share!

Thanks for hopping by, see you soon, until then Happy Crafting!

Love
M x

ps While you're reading this I'll be at the ideal world studios showing off some Purple cows tools!! I'll be live on ideal world at 2pm then on the repeat at 5pm on creat and craft :)

Wednesday 26 May 2010

From Glitz with {vintage} love


Lealholm

I recently took a trip to my parents house in North Yorkshire where I grew up and managed to take my camera out and take a few trips down memory lane. Lealholm is a small village in the middle of the moors and is somewhere I spent a lot of my time as a little girl. It's 'oldy wordly' and has changed little over time so I wanted to reflect that in my layout. The Vintage Love line from Glitz designs was the perfect choice for my project with a few glitzy exras thrown in for good measure!

Before I meander through my creative process I'll share with you my Glitzy shopping list:
Vintage love patterned papers; Velvet, Stripe, Damask, Polka
Vintage Love compass stamp
Vintage Love accents and stickers
Vintage Whatnots
Vintage paper layers
Teeny Alphas Brown Round
Paisley Flourish rub ons
Winged rub ons
I've added a few extras here and there from my own stash too.

I started by selecting my photos ... tough call as there were many :) and chose to convert 3 small photos into sepia leaving my main large photo in colour. I further distressed the photos with my trusty nail file and Vintage photo distress ink.


My base was the velvet paper, and I think it really does look like velvet! I love the fact that the Glitz papers are double sided and always try to show a little of the flip side if I can. I distressed the edges and stitched the frame with my sewing machine, a little distress ink took the white cotton down in colour and turning the page corner revealed the gorgeous pattern on the other side.


Taking a strip of the damask paper, and with a little more distressing :) I started to build up the layout background with the compass stamp and paper layers.


The polka paper made a perfect mat for my main photo. After the edges were distressed and inked I curled the edges of the paper up and inwards to create a strong focal point on the layout.


Now, I love detail, so I punched the sides of the Notes page from the pack of Whatnots as I knew I would use it for my journalling, what I didn't know was you wouldn't be able to see the detail once the layout was assembled LOL But I know it's there and thought it was a fun detail to share with you for future reference.


I started to piece the layout together and had to stop myself from using all the yummy elements I had out! I tend to be a more is more girl when it comes to my pages but even I have a limit LOL. It was at this point I realised my small photos needed a lift so I added them to some mats made from the stripe paper, distressed of course!


The Glitz paper layers are great fun and so different to anything out there, I used one page and cut the carnation from it making it into an embellishment and used a ripped piece of the text under the photo on the left side. A winged rub on added to some acetate and cut out, a card stock sticker distressed, a grunge board flourish inked, some lace and prima flowers created the rest of my embellishments.


And the finishing touches were an oversized paper clip I found on the floor in a car park ages ago! (washed of course :))


A small piece of a paisley rub on to the top left of the Damask strip and the oh so cute Glitz Teeny Alphas for my title.


I love dimension on my pages and lots of detail


and I {vintage} love my page of happy memories.

Thanks for taking this Glitzy trip with me and I hope you feel inspired to have a play with some Vintage love ... it is oh so yummy!

Until soon
Happy Crafting
Love
M x

Tuesday 25 May 2010

Lost in space!

Hi all, thanks for stoppping by!

Today is my project of the day over at the lily pad for Banana Frog and I want to share a little bit of space with you all ...


A fun interactive card using the fabulous retro space stamp set, distress inks, mica, spritzed water, embossing and acetate ... hop on over to the frog blog for the full step by step low down :) And while you're there go to this post and leave a comment to win £100 of stamping goodness as part of the Birthday celebrations at the Lily pad AND for another chance to win £100 just go shopping! Buying anything Froggy will automatically put you in with a chance to win! All that stamping goodness how could you resist? Good luck you have until the 30th of May to enter :)

I hope you're all well and happy and until soon Happy Crafting
Love
M x

ps tomorrow 26th May 12 noon, create and craft tv, purple cows tools .... I'll say no more ... eek!!!!

pp.s tomorrow here a Glitzy project to share!

Saturday 22 May 2010

Simple Things

Hi all

It's that time again over at It's a Creative World when the creative Girls share their take on the word prompt of the month for the year long Simple things project.

I love how we are all interpreting the words differently, so far we have had simplicity, time and honesty and this months word is CREATE. The projects are all taking many forms from digital scrapping to art journals, quilt making to my treasure chest so why not pop on over and investigate, be inspired and even play along!

Here's my project for this month...


An altered set of playing cards laminated with my Purple Cows Kool laminator that provide me with little snippets of inspiration to CREATE when the mojo won't play :) Read all about it on the IACW blog and check out the rest of the inspiration from the creative girls.

Thanks for stopping by ... can you believe I'm actually being organised with my blog posts? I have quite a few scheduled to publish ... I'm scaring myself LOL I will be back between these scheduled post to fill you in on 'stuff' in real time soon. As I write Stan and Ollie are great, Ollie has been out on the lead HILARIOUS! and no doubt I will share piccies soon :)

I hope you're well and happy, until soon
Happy Crafting
Love
M x

Tuesday 18 May 2010

It's a creative world!!

Hi all!
And it is a creative world isn't it? I am constantly inspired by the creativity I see whether it is on the numerous amazing blogs I frequent, magazines, books or even TV commercials and not least by the girls over at It's a creative world!

As you know I have been honoured to be invited as a guest over at this inspirational blog for the 2010 simple things project and I am honoured again to have been invited to contribute to the team! Today is my first post as an official creative girl!

Warning those of a nervous disposition please don sunglasses LOL!


Fashion victim?

My post title is faux Hipstamamtic and I got to playing with perfectly scanned and fixed old photos and returning them to their dodgy gloriousness :) Pop on over to see more details and while you're their enjoy topping up on some inspiration from the other creative girls!

I hope you're all well and happy, thanks for stopping by and until soon Happy Crafting
Love
M x

Sunday 16 May 2010

Retreats, workshops and puppies

Hi all ... well it's been a while again hasn't it!! Life seems to have been crazy busy, creatively and domestically and so I find myself having fallen by the wayside on my good blogging intentions but heh ho I'm here now :)

On the domestic front Oliver Pickles has well and truly become part of the family, but boy how quickly you forget how much time a puppy demands especially alongside still trying to give Stanley Dervish the attention he's got used to having, but I wouldn't be without them. They're hilarious and I think Stan quite likes Ollie now ... phew! Hubby also made it home from his volcanic ash adventures, he came home for a total of 24 hours, went off again but has been back for the last week and has been a star looking after us all while I have spent much needed time in the studio catching up with myself, however this is the chaos that is now my little crafty corner ... oops!


On the crafty front I had a fabulous day teaching at the Scrap-a-Jack retreat last weekend in Stratford-Upon-Avon. This was one of my classes 'Scrappy Time'


Made with corrugated card (all for the up cycling :)) and gorgeous Glitzy goodness from the Olivia line, oh and a real clock!

and this weekend I had a fabulous time doing one of my workshops at Bee Crafty. I let the girls loose with acetate, stamps and alcohol inks and they all created their own version of my reverse canvas. You can see mine here in my website gallery and here's a selection of what the girls created


I love the fact that each project came out completely differently (and the girls enjoyed getting messy :))

Talking of retreats and classes the Scrapping Angels retreat has been re scheduled for the 12th/13th of June after Anna's adventures thanks to the volcanic ash cloud. I believe there are a couple of spaces available so why not come along and play?

In between times I created a waterproof wall hanging for Purple Cows which will be available over on the PC blog as a free PDF soon


and also hosted designer Friday with some cards using hot foils with my Purple Cows laminator, more info can be seen here


There has been much more craftyness going on but the kind I have to wait to share with you :) So all that remains for me to say is ...

And Finally ...

Oliver tried to get in on the act of trying the cardboard snout on for size


Stan and I had a run in with some cows that were far too interested in us, even if they were in the next field my inate distrust of them made us abandon our walk as the cows, that we realised were bullocks, ran along the hedge trying to get us!!


Morning cuddles .... life aint so bad :)


Guard dogs extraordinaire???


and Oliies trip to the vets for his second puppy injections, Stan kept his 'arm' round him the whole way ... bless


and that vet trip also means today is the day we take Oliver out on the lead for the first time this afternoon ... look out!!!

Ok my lovely cyber buddies that's it from me, thanks for stopping by and until soon Happy Crafting
Love
M x

Saturday 1 May 2010

Happy Froggy Birthday!!!

Hi all
Well it's turning into a Froggy weekend! Today Banana Frog is 4 years old HAPPY BIRTHDAY!!! Go and have a look at the blog to catch up on what Bev has to share with you all! I happen to know there is a new special release, Tadpole stamps! An ickle set of stamps to accompany the new release Hiya Chick, and it is oh so cute! How do I know? I got to play with it of course :) and here's what I made...

You make my heart sing


Ingredients
Tadpole birdy stamps
Banana Frog I heart you stamp set
Banana Frog Super dreamy stamp set
Basic Grey Urban prairie papers
Distress inks in Peeled paint, Walnut, Black soot
Archival ink, Black (or any permanent ink pad)
Pro markers
Corrugated cardboard
Prima self adhesive pearls
3 ½’’ x 3 ½’’ photo

One of my favourite things to do with my Banana Frog stamps is to make my own customised patterned paper and this bird set is perfect to do just that! I decided it would make a fun scrapbook layout. Want to know how I did it? ... well here we go...

Stamp the outline bird randomly onto some plain white paper, mine is from the Basic Grey urban prairie range but a white cardstock would work just as well.


When you stamp the pattern fill in the gaps with just the tail from the bird by laying a piece of paper under the stamp so only the tail will appear on the background paper


Now go to town with some pro markers and colour in the birds.


Cut out a birdhouse shape from some corrugated card, cutting out the middle to frame your photo and cover it in some patterned paper. Using a heart from the ‘I heart you’ stamp set stamp out a few hearts onto some patterned paper and cut them out to make roof tiles for the birdhouse


Curl the hearts slightly with your fingers and build up the hearts as tiles on the birdhouse roof


Cut out the door for the birdhouse in double sided paper (or attach 2 pieces together as I have done) and add journalling to the inside including the ‘shake your tail feathers’ stamp


Attach your photo to the back of the frame in the birdhouse and attach the door with a paper hinge (a strip of paper folded in half, with half stuck to the door and half stuck to the frame) Stick the house in place.
Make a tree branch from some corrugated cardboard that you will strip once the shape is cut out. Attach it to the layout.
Stamp out some hearts (from the I heart you set again) in peeled paint distress ink onto some white cardstock to make leaves and stamp out some outline flowers from the Super Dreamy stamp set onto some patterned paper, cut all these out and decorate your branch and top left side of the layout. Add some pearls to the flower centres.


Finally stamp the little solid bird onto some acetate with a permanent ink and cut out, you don’t have to be exact on the cutting out here as the acetate round the outside of the image is clear. Attach it to the layout on foam pads for extra dimension and to finish off stamp the ‘you make my heart sing’ phrase onto some white cardstock and matt and layer it adding it to the layout on foam pads as well as a title plate.


And that’s it a fun and interactive layout with patterned paper, journaling and embellishments created completely from Banana Frog stamps! I hope you manage to snag the tadpole set and enjoy your little birdie stamps as much as I have …. The possibilities are endless! Now I'm looking forward to playing with the Hiya Chick set ... it's so new not even the Froglets have it yet!

I hope you enjoy the birthday party at Froggie HQ and feel inspired to get stamping! Thanks for stopping by and until soon Happy Crafting! (I'm off for some birthday cake :))

Love
M x