Just thought I would pop in and share a little Serif with you from the shows I did on Create and Craft TV last weekend. It was so good to be back after an absence and I had so much fun! It really is a great TV family and we do laugh!
I was showing The Good life double CD collection of Digi kits and stamps over the Create and Craft birthday weekend, at the moment the kits are only available through Create and Craft and you need Serif Craft Artist 2 Professional to power them .... so here we are some of the samples as seen on TV all created from the 6 The Good life kits...
Chocolate Heaven - Food and Drink kit
I have used the torn edges in the graphic style section on the material for the background (style tab on left side > edges > paper > torn and increase line as you wish) I have also cut up some of the embellishments so the garden of cakes can be split up and images used individually to fill in gaps (select embellie > pick up scissor tool > cut a little way into the lank area of selection > click select > click on then off embellie and when you go back onto it you'll find the elements have been separated NB this doesn't work on all embellishments)
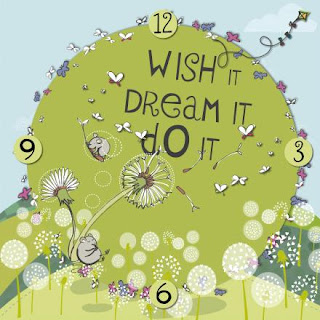
Clock - Words of Wisdom kit (mainly)
This is an image that I printed onto printable canvas and then stuck to the front of a bought canvas that held a clock mechanism (the canvas came from B&M) I've used the shape tool to create the circles (hold the shift key down as you draw the circle out to create a perfect circle) I then re coloured from within the digi kit colour palette. I applied one of the Digi brushes from the kit around the circle (select the circle > go to brushes tab on left > drop down and select digi kit > click butterfly brush > go to line tab top left > increase line as desired)
Daisies plaque - words of wisdom kit
This is a 12 x 9 wall plaque - a bit of home décor which these kits really lend themselves to.
Baby - Happy Families kit
This shaped layout is created by punching out some material from the kit (Punch tab top left > shapes from drop down > select shield and drag onto material > resize as required and punch) I then created the matt in the sae way but punching from a square created with the shape tool and re coloured from the digi kit palette. I added line round both to add definition (select shape > bring frame image top of colour box to front and select colour > line tab next to colour box and increase line) I used an intelligent photo frame and added he photo I then dropped this behind the light blue matt (with photo selected go to arrange bottom left > send back one) while it was still selected I then picked up the eraser tool on the top tool bar and erased away any photo and frame showing (it will only ease the item selected) Once happy I bought it back to the front. I then added the 'hill with flowers' embellie and repeated the eraser process so it sits within the shape. I added the tree from the kit and flowers from a search in the digi browser. (I separated the 3 daisy type flowers as I separated the embellies in chocolate heaven above and then erased he stalks with the eraser tool to add to the bottom of the plant pot. I also selected the photo at the end and went to the [photo lab to add an effect to it (photo lab > effects > style > comic book)
I see no ships - By the Sea kit
The photo on this A4 layout was put through the cut out studio and then a scene built around it from the kit.
Lilly on the Farm - Friends forever
Another photo put through the cut out studio and placed in a scene created from the kit.
T-Shirt - Words of wisdom (mainly)
I created a t-shirt from this image by printing onto t-shirt transfer material and ironing in place (top tip when cutting an image from t -shirt transfer material cut as close to the image as you can to keep the image tidy)
Front and Back of a bag - words of wisdom kit
I printed these two images onto printable canvas and used pinflair glue to attach them to the front and back of a hessian shopping bag. The background is created from the shape tool and coloured from the digi kit palette. The front image is and embellishment and the two pigs backs are as well but minus the bird so I copy and pasted the front image so it was the right size and then used the eraser tool to erase the pigs just leaving the bird shape. I then used the shape tool and drew an oval to fill in the front of the bird (the circle tool without holding the shift key so you can create an oval) and then coloured it from the colour palette so it exactly matched the colour of the bird, I then grouped it and the bird embellie and put it between the backward pigs sending it back one on the arrange tab so the edges are hidden by the pigs. The heart was also created with the shape tool and the faux stitching is from the digi brushes (draw a square with shape tool > take away any colour fill or line > brushes on the left > global > embroidery > select running stitch with eyelets > Line tab top left > increase line as you wish)
Dirty faces - Friends forever kit
The one not seen on TV as Dill brain forgot to print it!! Pretty straight forward using an intelligent frame and the quote has been put through a sticker style to make it pop off the page. (select text > styles left side > sticker from drop down > select the effect that suits)
Dreaming - Words of wisdom
I love all the dreamy imagery in this kit with flying sheep etc. Quite straight forward 12 x 12 with the photo held in an intelligent digi frame.
I've added explanations where I can as a lot of you have been asking questions about some of my projects .... I hope they make sense :) Thanks for stopping by and letting me share some of my samples. I hope you're well and happy and as ever .... until soon ....
Happy Crafting
Love
MJM x


