Showing posts with label collage. Show all posts

Friday, 14 November 2014

An upcycled canvas with a secret

Hi all

Well where did the last month go?? Life has a nasty way of interfering doesn't it? and it seems someone upstairs has their finger pressed firmly on the fast forward button of life, is time speeding by for you too? Anyway I'm not here to waffle LOL I'm here to drop this off
 
My latest creation for the Scrap365 blog inspired by some modern Mexican artisans.

It started with this...

.... lots of upcycling, using up some of the bits I snaffle away and a little getting messy!! To see how this pile of 'stuff' turned into my canvas and what the secret is hop on over to the Scrap365 blog for a step by step post :)

Before you go it's been nice to *see you* I'm trying to get back into my cyber routine now and will be back with you soon for a quick catch up and round up of my last month .... see you then!

I hope you're well and happy and, as ever, until next time
Happy Crafting
Love
MJM x

Monday, 18 April 2011

Glitzy Springtime and Bunnies

Hi all,
Spring is here and with it arrived a box of new goodies from Glitz Designs on my doorstep. It's contents made me smile as much as the blue skies, the flowers in the garden and the lambs in the field, the new lines are yumsville and I know you're going to LOVE the new stamp sets. So what better thing to scrap first than some Spring photos!


This layout is inspired by the beautiful Spring day today and the 'song' I have journalled. It is from one of my all time favourite films Willy Wonka and the chocolate factory (the original Gene Wilder version, love you Mr Depp but Gene rules this one!) and I sing it a lot at this time of year, but originally it came from As you like it by Willam Shakespeare and even then he was quoting from a celtic ballad 'it was a lover and his lass' ... hmmm best stop waffling and let you know what I used!

Glitz Designs Afternoon Muse papers; Banner, Stripe, Block, Floral, Carte Postal, Polka
Glitz Designs Laced with Grace paper; Butterflies
Glitz Designs Afternoon Muse and Love Games Clear Stamps
Glitz Designs Afternoon Muse Glitzers
Glitz Designs Afternoon Muse Paper Layers
Glitz Designs Teent Alphas; Burnt Orange, Cream, Bubble gum pink, aqua block, yellow block, apple green block
Glitz Designs Maya cardstock stickers


I cut out all the shapes I needed for the fields, rainbow and clouds etc distressing edges as I went. When doing a collage like this I use a plain 12 x 12 piece of cardstock to build it on so I don't waste too much of my precious paper (this also means it's a great way to use up scraps!) The colours and patterns of the afternoon muse papers are great for my happy spring collage, love that polka paper!


The hot air balloon and sun rays are made using the new stamps. So useful and so much fun not to mention brilliant stamps that give a great image every time.


I took some photos of the lambs in the field next to our house and cut them out to fit into my collage and cut out the photo of my nieces (a great way to lose a dodgy background)


With scissors still in hand I cut out lots of flowers from the floral paper even ones that were missing petals (as they are tucked under flowers in the design) and those around the edges as they still work when I layer everything up.


Once I'd layered all the flowers around my photo and tucked some behind the 'hills' I cut out some of the butterflies from the laced with grace paper, curled the wings and added them all over the collage.


Finally I set to with the teeny alphas. My favourite all time alphas ever and I LOVE the new additions to the line with their mixed up style of letters, the colours make my heart sing! I added some doodled journalling inbetween and doodled in places on my collage


and that was it done, a happy spring time layout with one of my favourite photos of my nieces. My second layout stays with my beautiful nieces and something else that happens at spring time ... Easter.


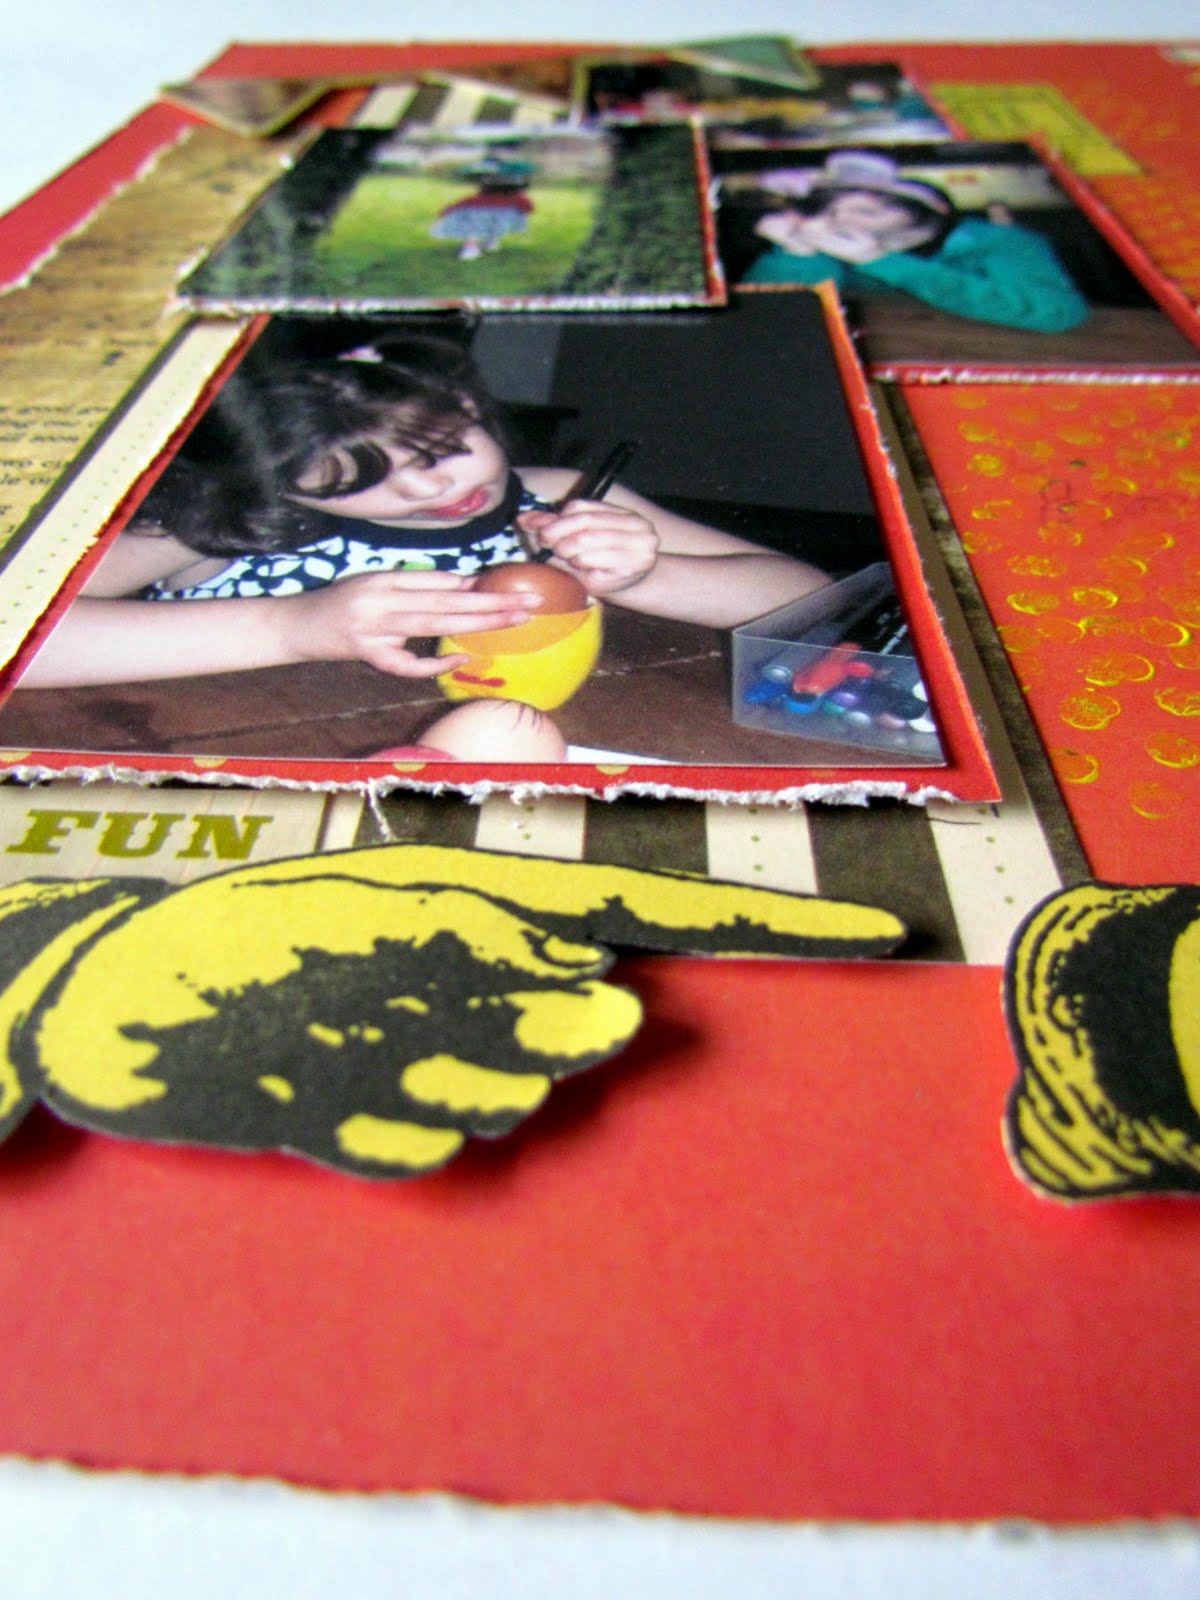
This is a record of a really fun Easter weekend spent with them and my sister. Decorating eggs, eating roast dinner and driving the girls crazy with a fiendishly clever Aunty Michelle treasure hunt LOL. Here are my ingredients;

Glitz Designs Laced with Grace papers; Rose, Stripe, Polka
Glitz Designs Afternoon Muse paper; Floral
Glitz Designs Laced with Grace Peek-a-boo
Glitz Designs Laced with Grace Clear Stamps
Glitz Designs Afternoon Muse Peek-a-boo
Glitz Designs Afternoon Muse Cardstock Stickers-titles
Glitz Designs Afternoon Muse Paper Layers
Glitz Designs Clear stamps Distressing set 2
Glitz Designs Teeny Alphas; cream


The orange tones with the playground imagery from Laced with Grace mixed with the Afternoon Muse yellow were perfect to tell my story. I broke up the orange 12 x 12 by stamping, using a distress stamp with yellow paint, around the area my photos would sit to tie everything all together.


I stamped images on to the yellow paper and also adhered one of the Afternoon Muse peek-a-boos onto it to pop it off the page.


I lifted my photos by matting them onto some of the polka paper and cut out the photo of my bunny eared niece to create a photo embellishment of my own.


I framed my cut out niece with a peek-a-boo from Laced with Grace and as it has a cut out centre I could pop her out of it on foam pads for dimension. I added an orange butterfly from the paper as an extra embellishment.


The cut out stamped images, cardstock stickers, a paper layer and those gorgeous teeny alphas finished off my layout. Another happy layout that makes me smile

So what new Glitzyness will you use to make you smile? .... warning! You will be spoilt for choice .... whatever it is please share it with us and now there is the perfect opportunity to show off your Glitz with the new Monthly challenge, see details here and get Glitzy and creative!

Thanks for stopping by and letting me share my projects with you. I hope you're all well and happy and enjoying Spring, until soon Happy Crafting
Love M x

Sunday, 16 January 2011

Tropical collage

Hi all, I have an offering over at It's a Creative world today


A bright and breezy tropical collage to help chase away those winter blues :) Why not hop on over to the IACW blog and read the full post .... enjoy :)

Short and sweet I know but I'll be back soonad may even blog from my beloved Mexico where I will be landing today ... Yippee!!

I hope you're all well and happy and as ever until soon Happy Crafting!
Love
M x

Monday, 20 December 2010

Festive Glitzy fun

Hi all, with the festive season upon us I thought I would share some fun and festive glitziness with you;


Happy Christmas
I love creating collages and paper dolls, my Christmas card last year was a print from a paper doll collage I made so I thought I’d do the same again this year, especially with all the gorgeous Glitz colours to play with. These collage projects are great for using up all the scraps we all keep and I have used a veritable feast of Glitzyness in this project so with a deep breath here is my shopping list;

Glitz Designs Love Nest papers; stripe, floral, polka and sky
Glitz Designs Scarlett papers; polka and stripe
Glitz Designs Hoopla papers; floral and polka
Glitz Designs Hoopla GlitzersGlitz Designs Hoopla cardstock stickers; titles
Glitz Designs frosting; pink/clear
Glitz Designs Glitzers; circles
Glitz Designs Teeny Alphas; Red block


Phew! I have scrapped this page in A4 UK size (which is about 8 ¼’’ x 11 ¾’’) I sketched out my scene and then pieced my papers together to create a background on the Love Nest stripe base. Using a decorative cutter on different green papers I cut strips for my tree layers and used the bunting from the hoopla cardstock titles in the top corner, I cut the strip to allow me to ‘curve’ the bunting on the page.


I then decorated the tree with the circle glitzers (I love Glitzer stickers, with a clear base you can see through and bling encapsulated in them they are so easy to use!) I also added some pink frosting for extra sparkle.


I made some parcels, stacking them up and adding contrasting ribbons, inking all the edges to add definition.


I then made my paperdolls using white card and coloured them in with pencils and making clothes from my selection of Glitz papers, inking edges to create shape. I printed head shots of me and my husband to go on the dolls.


After dressing the dolls I added them to my page on foam pads for extra dimension.


I added further decoration to my scene with Glitz frosting gems on the shoes and the hats, a star for the tree and the balloons from the Hoopla Glitzers.


Of course a family scene wouldn’t be complete without Stan and Ollie so I printed out a small photo of the dogs, cut them out and made antlers for them. I added my title using the teeny alphas and sat the boys on top of the letters.


With a bit of extra bling here and there and final touches my fun festive scene was complete, well it makes me smile!


I will scan my page and create prints for the front of my card blanks and send out some festive Glitzy fun to my family and friends for Christmas. What will you create today that will put a Glitzy smile on your face? Whatever it is I would like to take this opportunity to wish you all a very happy and safe Christmas and may all your festive wishes come true. I’ll see you soon and until then, as ever, Happy Crafting
Love
M x

Friday, 6 August 2010

If in doubt ... cut it out!

Hi all!
It's my turn to share some Glitzy goodness with you today.


Dance to your own tune

My mum took this picture of my niece in a Goth shop recently and as soon as I saw it I knew that the Glitz designs Distresed Couture collection would go with it perfectly!
I used Distressed Couture vines, blocks, scrolls, glitzers, rub ons, journalling cardstock stickers,Black fleur de lis rub ons, fancy frames rub ons and red & black frosting

Because the photo was taken in a shop there is a bit of background 'noise' that I didn't want..


Now I know there are fab photo programmes that you can use to repair such things but why not just cut out the photo with a pair of good old fashioned scissors? You can get some interesting shapes to play with and spark new ideas too!


I laid it up on to some of the the vines paper that I knew would match the dress perfectly and added a mat of the news print paper behind the photo top lift it


and to lift it further added the corner of the fleur de lis rub on behind it, these large squares of rub ons are so useful!


A fancy frame rub on was added behind the image for that goth accent and I filled it with the butterfly rub ons. The Love glitzer was perfect but I only wanted red and black bling on the layout so I coloured the little gems set into the sticker (such a clever idea!) with a permanent pen. I added some lace, safety pins and a flower head from a cheap spray of flowers I picked up!


The tattoo type rub on was a perfect accent for the page as were the red and black frosting strips that I used to create my own flourish shapes.


Finally a few scraps of distressed couture papers, a safety pin and a cheap metal silver charm coloured with permanent markers pulled the layout together.

So now you know what I mean by 'if in doubt ... cut it out!' and so I thought I would take it a step further for the next layout!!


Megan Scarlet and Winston

This is my other niece and this picture makes me smile! The Kismet collection matched the photograph colours brilliantly. This is what I used; Kismet dots, ledger, numbers, floral, rub ons, glitzers, accent stickers. Teeny alpha red block, vintage paper layers and Hot mama alphas.

Again the photo didn't have a great background so I cut Megan out.


I decided to make this a collage page and set about cutting out cloud shapes and a rainbow from the papers. I used china blue distress ink to add to the 'cartoon feel' of the pieces and did my favourite thing with the glitzers and rub ons by adding them to some acetate to cut out.


I layered up all the elements, cut out the balloon from the paper layer and added some white doodling to lift everything from the page.


I had run out of a couple of the alphas so I cut the outline from the sticker sheet, using the negative as my missing letters and I just love the teeny alphas!!


I layered up the glitzers and rub ons I cut from the acetate onto foam pads for added dimension and that's it a page that makes me smile!

Now you can take this cutting out photos thing a stage further if you wish ... I love to make paper dolls...

a layout of the Glitzy girls I did a while ago (using the Maya collection)... but you don't have to go this far if you don't want to LOL!

Thanks for stopping by, I'm now tapping my fingers on the table eagerly awaiting my new glitzy goodies, how about you?
I'll see you soon, until then Happy Crafting!
Love
M x