Showing posts with label embossing. Show all posts

Saturday, 4 June 2011

Glue stick embossing!

Hi all, today it's my turn to share a project over on the Banana Frog Lilypad.


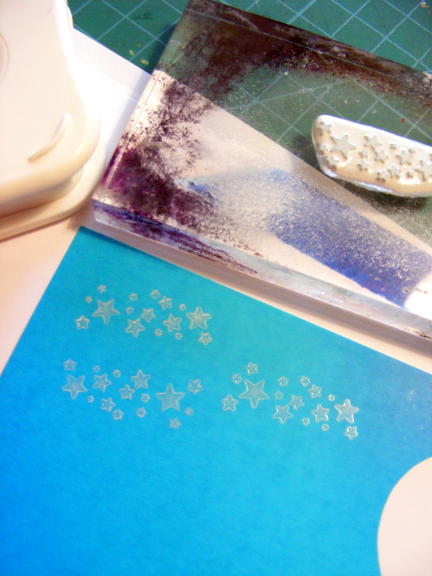
It's a technique based project using a glue stick for that distressed embossing look. Step by step photos are on the frog blog, so why not hop on over and take a peak and get creating with your glue stick!!

I hope you're well and happy, life has been busy in Mogford towers as usual but hopefully one of these days I will keep my promise to come back and have a chat ... you never know stranger things have happened :)

Until soon Happy Crafting
Love
M x

Sunday, 30 January 2011

Froggity Blog hop

Hi all
And welcome if you are here via the Banana Frog blog hop, but you're also welcome, ofcourse, if you have just arrived here in passing! If you'd like to join in the hop it's not too late just hop on over to the Lilypad and start at the top of the list I know you will find loads of inspiration along the way from the oh so talented froglets!

At this point I am adding in that this post is late (sorry) as I have holiday brain and have gained a day somehow .... hmm margueritas?? I am also now saying a HUGE sorry as now this post is publishred all my photos seemed to have disappeared from my post!!! I'll post the lovely photos (such a shame I love this project!)when I get home next week as I don't have them with me :( I also prepared this post before I flew off from blighty and before the winter theme for the hop was decided ...oops! Going well so far LOL ok enough extra waffle let's move on :)

So here's my project for today, with valentines on the way I thought I would share some Lurve!


Love Tokens


The ingredients
This project uses the aptly named It's all about love stamp set and the DeLouisville tadpole set. I have also used some Bubblegum Canford card, white card, colorbox archival ink in Firebird, red devil and dark cherry, Embossing ink, cosmic shimmer ruby blush blaze embossing powder and a pink doodle pen.


Stamp the large heart from the set on to some white card and draw a line around it larger than the image, cutting it out to create a template for the top and bottom of the box.


Draw around the template onto the pink card and once again draw around the image creating a margin to snip so that it can be folded over and create the anchor for the sides of the box.


Fold up the snipped sections and adhere a strip of card around the hearts. Before adhering the strip around the top of the box, stamp it with the small dangling hearts fronm the samp set. NB you need to make the top heart the merest fraction bigger than the bottom so the lid fits on the box snuggly


Stamp the large heart onto some white card and cut out following the scallops, then stamp the large heart again on to some pink card this time cutting just inside the line of the inside heart to create a mat for the box top.


Emboss the smaller heart onto some white card and cut it out to create an embellishment for the centre of the box top.


The box could contain any treasure for your loved one to enjoy but I think these love tokens are fun, personal and in expensive as they can carry such promises as breakfast in bed and a day of sport on the telly! Stamp the large heart onto some white card and cut out following the scallops. Use the Tadpole set of DeLouisville to write the word and doodle around the heart with a pink pen. The 'claim' for the token can be written on the back.


Add some tissue paper in the bottom of the box, maybe some chocoates and a few love tokens and enjoy that specal squidgy feeling when you give it to your loved one and they admire the effort you've made to say 'I love you'

I hope you feel inspired, and talking of inspiration your next stop is the talented
Lory and I know she will be better organised than me :)
Enjoy the rest of the hop and thanks for stopping by my little section of the Lilypad :)
I hope you're well and happy and until soon Happy Crafting
Love
M x

Friday, 26 November 2010

Lilypad lesson

Hi all

This is the last of my Banana Frog triple for now :) My Lily pad lesson for today


Me and you, canvas on canvas

Class is in session now over at the lilypad and over there you will find step by step instructions for stamping onto canvas, image transferring onto canvas and creating a bespoke piece of home decor to create your own canvas on canvas project


I love the dimension of this piece and it takes pride of place on a little easel on my bookcase in the front room now


Another bonus is the swirl stamp set that I have used is in the Banana Frog sale at half price, so you can grab a bargain to boot when you visit the Lilypad today :)

I hope you enjoy class and I hope you feel inspired. I'm off to start creating the next project to share with you ... whatever that may be :)

Thanks for stopping by, stay safe, well and happy and until soon Happy Crafting!
Love
M x

Saturday, 16 October 2010

Do not open until December 25th

Hi all
It's my turn to share over at It's a Creative World today and I thought I would bring out an oldie but goodie, well it only gets out once a year LOL
Here it is


An interactive memory advent calender that will fit in with your Christmas decs and if you'd like to know more, like how I did the text transfer or stretched the paper to paint, pop on over to IACW and read my far more detailed post over there as well as getting Christmas inspired by some of the other creative girls on your visit .... well it would be rude not to :)

Now while I'm here I want to ask ... how are you? It has been an age since I sat and wrote a real life blog, it was way back at the end of July so I must rectify this soon, if for no other reason than to share some pics of my woofs, they are well and bonkers as normal!! Life just seems to be going so quickly doesn't it! I know the battle cry as we get older is time goes fast but oh boy! this year them upstairs certainly have ther fingers pressed on that super fast forward button don't they!

And while I find myself chatting can I just say a huge thankyou for all the lovely messages I've had in various cyber places I frequent about the Serif POW shows on Create and craft, I do really appreciate you all taking the time out to find me and leave me some love :)

Ok rambling now, I'll save up the rest for a real life post ... very soon I promise!

I hope you're all well and happy, until soon Happy Crafting!
Love
M x

PS do you remember I mentioned retreats a couple of days ago? Well I've just been officially announced for the Scrap-A-Mia retreat in May, check out the side bar for details .... I am so honoured to be with such an AMAZING line up of teachers (if not a little nervous LOL)

Saturday, 25 September 2010

A merry Froggy Christmas!

Hi all

Today it's my turn at Project of the day over at the Lilly pad. Oh my life can you believe it's only 3 months to Christmas day?

So with all my froggy Christmasness over the last month I have decided to add the finishing touches to my Christmas table with this


A Place setting fit to accompany all my recent frog projects


Faux luminarys from last months project of the day, a Christmas card from this months colour focus and a Christmas cake from my Lilypad lesson.


As ever pop on over to the frog blog to see step by step pictures and instructions for my place setting.

BUT before you go! Do you fancy an early Christmas present? The lovely Bev has said I can give away one of the new Christmas stamp sets to round off my Christmas month nicely and all you have to do is leave a comment on this post AND go and leave some love on my post over at the Lilypad, Shimples!! You have until the 30th September which is frog hop day :) Good luck!

Thanks for stopping by and until soon Happy crafting

Love
M x

Monday, 13 September 2010

Lilypad lesson

Hi all

Today I have a rather festive, edible, stamping treat posted on the Banana Frog blog for my Lilypad lesson ... want to see? ... ok here it is...


A quite spectacular Christmas cake fit to grace any festive table!

I know it's only September but Christmas has a way of sneaking up doesn't it? so I feel it's never to early to start those seasonal plans and with the new Christmas Banana Frog stamp releases I couldn't resist getting into the festive spirit! In fact it's been somewhat a festive month for my posts at the Lilypad and I have another to share on the 25th to complete it!


I have used one of my favourite stamping techniques for the decorations ... triple embossing


and if you'd like to see the full step by step project hop on over to the lilypad and check out my post :)

Thanks for stopping by, I hope you're all well and happy andI'll be back soon, until then Happy Crafting

Love
M x

Saturday, 4 September 2010

A Christmassy colour focus

Hi all,
Well it's colour focus time again over at the Lilly pad with Banana Frog, I can't believe that means another month has gone ... this year is going fast isn't it .... or is it just me? Anyhoo hop on over to the Lillypad to see a pic of our colour focus inspiration and check out the other talented froglets interpretation of it then hop back here and I'll share more step by step piccies of my project ... see you in a mo :)

..... Oh good your back, Some lovely stuff there isn't there! Ok so as promised here's my project in a little more detail ...


I'm really loving all the new Christmassy Frog stamp sets and feel I maybe having a seasonal month with my Lilly pad lesson coming up and my Project of the day later in the month .... well tis only 3 months away eek! So let's get started on those Christmas cards!


The ingredients for the reindeer card are the Banana Frog it's Christmas deer stamp set, Big and Juicy waterfall ink pad, a speedball brayer (my new toy :)) some silk art card, black card, white stayz on, perfect medium clear ink, blonde moments black embossing powder, some rbbon and a bit of bling.


1st up I taped a piece of silk art card to some scrap paper (I taped it to a 5'' square size) and then cut a mask from a post it note to add as a moon.


I took my brayer to my ink pad and picked ink up from the dark blue side towards the middle. The big tip when making a graded effect is to take the hard edge off the inside edge of the brayer by spinning it on some scrap paper to take the ink off the end of the roller. I went across the square at a diagonal ...


...then spun the card round to repeat the same thing on the other corner until the ink met in the middle.


I trimmed the silk art card down to it's 5'' square and then removed the moon mask and added some of the oh so cute tiny stars from the stamp set using white stayz on.


I stamped the deer image with some clear perfect medium and embossed it in black to create a strong focal point. I also made sure the antler overlapped the moon to create a bit of drama to the scene and tie the image together.


Using a bit of offcut from the silk art card that had been coloured when I was brayering, I stamped a sentiment from the stamp set with the prefect medium and embossed this. I cut it down and mounted it onto some white card with a decorative edge courtesy of my Purple cows trimmer.


I made a large white mat with a decorative edge, added a ribbon to the blue square and built up the pieces on foam pads for dimension. The finishing touch was a little bit of bling .... well it is Christmas :)

Moving onto the yellow and red I picked out from the colour focus inspiration..


This time the ingredients are the same as above but this time I used the Banana Frog Christmas Elegance stamp set and Big and Juicy mountain meadow ink pad.


This time I picked up ink from the yellow end of the ink pad towards the centre (again spinning off the hard edge of the yellow ink at the end of the brayer) And I made a vertical coating of ink.


Again I flipped the card round and repeated the process to colour the other half of the card.


I ripped down the edges of the card (towards me) to reveal the white core and then stamped a line of the baubles from the stamp set down it. I love the Merry Christmas sentiment in the set, simple and stylish! I then added some of the small snowflakes into the gaps using black archival ink.


I brayered a smaller square of silk art card with the yellow and red colours again the same way I did the blue square above. I then stamped the other bauble from the stamp set with perfect medium and embossed it in black.


Cutting the embossed bauble out I added it to the centre of the strip on a foam pad to create a focal point for my card.

And that's it! some Froggy Christmassy fun. I love the simple graphic look of Banana Frog stamps and I like the fact that they allow me to create simple, contemporary, stylish cards.....among other things like my Christmas table lights and the goodies I'm cooking up for 2 more Frog blog posts this month .... watch this space :)

Thanks for popping by, I hope you feel inspired to create and I'll see you soon. Until then Happy crafting!

Love
M x

Saturday, 21 August 2010

Inspiring, Inspiration!

Hi all, it's the simple things project day over at it's a creative world, our year long project with a new word to work with every month. Todays word is inspiration and here is my offering.


An altered jewellery box that is triple embossed with some grungeboard wings and inside


a concertina displaying a collection of my inspirational photos from Mexico.

There is a step by step in the post over there to make this super easy but effective little box of gorgeousness and of course while you visit you can be inspired by the rest of the creative girls :)

Today I am at Bee Crafty doing a workshop and we are making my inspirational carousel ... so yes all of those that have asked for it I am finally putting a DIY project together for it too :) And tomorrow I will be doing some show prep for my Serif show on Create and Craft on Monday but I'll be back soon!

I hope you're all well and happy and until soon Happy Crafting!
Love
M x