Showing posts with label maya. Show all posts

Tuesday, 11 January 2011

Soul mates and fun with Glitz Designs

Hi all and Happy New Year and what better way to start my creative blog posts for 2011 than with fabulous Glitz products! After all the recent festivities I am now looking forward to going on holiday next week to my beloved Mexico so I decided to look at last year’s photos to get me in the mood. While looking through the many files I came across a series of photos of me and hubby, part of our holiday tradition holding the camera aloft everywhere we visit, and I had to smile. People have always told us we look alike and one of my dear friends calls us split aparts, meaning two halves of one whole, and never have I really seen this until these photos I was amazed to see we are pulling exactly the same facial expressions, well they just had to be scrapped!


And what better papers and embellishments to use than Glitz Designs so here’s my list!
Glitz Designs Hoopla paper; Floral
Glitz Designs Love nest paper; Floral
Glitz Designs Hoopla peek-a-boos
Glitz Designs Love nest peek-a-boos
Glitz Designs Hoopla cardstock stickers; titles
Glitz Designs hoopla rub ons
Glitz Designs Love nest glitzers
Glitz Designs vintage whatnots
Glitz Designs teeny alphas green


I started by printing all 3 photos at 6’’ x 4’’ and then ripping away the excess from 2 of the photos and distressing the edges of the main photo. I added some rub ons to the edge of the main photo to fill in the dark space, the Glitz rub ons are so super strong they are great for adding on to your photos to add extra interest.


I added some of the torn Hoopla floral paper in strips and adhered my photos in place adding in the map peek-a-boo from the love nest collection and then framing the 2 top photos with peek a boos from the Hoopla collection. I think these peek-a-boos are a genius idea for adding layers to your work without too much bulk.


On the back of the main photo I adhered a casing of foam tape to act as the housing for my vintage what not journaling card and added a hoopla title sticker to the edge of it to peek out as a pull tab.


Adding a bit of ribbon to the end of the pull tab makes the hidden journaling more inviting to pull out and some ribbon on the other side of the photo ties the layout together.


The finishing touches were the gorgeous Glitz Designs teeny alphas, a number 2 from the hoopla title stickers and a little bird from the love nest glitzers for a little bit of bling, love those glitzers! And that’s it a simple layout with hidden journaling and added acetate interest from those peek-a-boos with a map including Mexico to boot!

And while we’re still in the post festivities mood and in the spirit of using up those left overs I thought I would do a fun and bright layout using the Maya range launched this time last year to make way for the new Glitzy goodness coming (take a peek on the Glitz website for the ’coming soon’ gorgeousness!)


These photos of my nieces make me laugh so much they really capture their cheeky spirit. For this layout I have used
Glitz Designs Maya complete paper collection
Glitz Designs Maya cardstock accent stickers
Glitz Designs Maya rub ons
Glitz Designs teeny alphas in pink


I have used loads of scraps of papers (you know that pile of bits we all keep because we can’t bare to throw them out!) to create the pattern on this layout and covered some naked chipboard alphas in scraps too for the title. The accent stickers do most of the rest of the work on the layout alongside the rub ons added to acetate to make the butterfly embellishments fly. The journalling is done in the style of an advert on tv at the moment and the teeny alphas are perfect for the punchline.
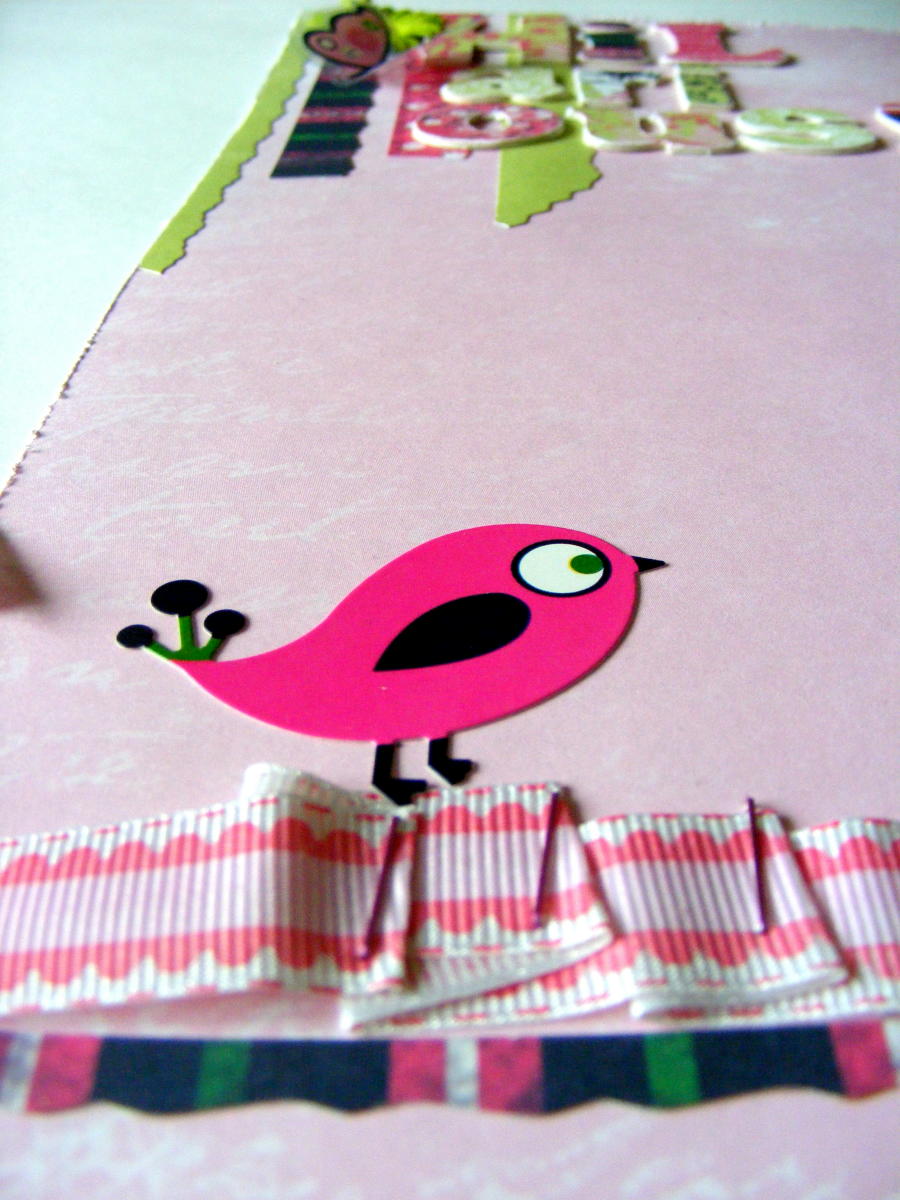

The Maya bird adds the whimsy on top of the stapled ribbon and layering up the scraps and alphas creates dimension. A happy layout that really makes me smile!

Thanks for stopping by and letting me share some Glitzy goodness with you today. I hope you’re all well and happy and until soon, as ever, Happy Crafting
Love
M x

Tuesday, 31 August 2010

Scrapping then and now with Glitzy goodness

Hi all!
Today I want to share with you a couple of my Glitz layouts aswell as tell you a little story! Are you sitting comfortably? OK! let's begin ....


1951

I'm asked one crafty question quite a lot 'how long have you been scrapping' and I always say, as most crafters do, since I was little. This page is inspired by my first memory of a scrapbook aswell as the fabulous Glitz designs Vintage love collection. When I was a little girl I remember spending hours looking through a scrapbook my mum made when she was a little girl. I was fascinated by all the old photos and the bits of victorian scraps and pictures she included. Today as a grown up scrapper myself I still find the book a constant source of fascination and now have it scanned page by page on my hard drive!


This is the scanned page that the photo I have used in my layout comes from and I love it even more that my Nanny's hand writing is on it, that's why I like to use hand writing on my pages, I think it is as much of a memory as the photo for me.

So what Glitzy goodness did I use? From the Vintage love collection I used love letters, velvet, damask (reverse side) and polka patterned papers. I also used the numbers from Save the Date clear stamp set (Glitz stamps are just fabulous!) A Vintage Love What Not and a Vintage paper layer.


I built up the layers by ripping, tearing, distressing and inking my pp's and stamped the date. I then used a water brush to pull in the ink to fill the outlined numbers.


To make my elements I made a polka dot mat for my photo, inked a piece of doiley, distressed the WhatNot and roughly tore the butterflies from the paper layer. I like the shabby chic look of these torn butterflies and also that you can see the text from the paper layer.


Assembling the layout I curled the wings of the butterfly and added them on silicon for dimension along with some paper flowers...


...and some vintage lace and ribbon. I love the fact that I am now able to scrap my mums scrapbook thanks to modern technology and fabulous Glitz products.

And so moving on to the here and now!


All the fun of the Fair

Last week my sister and 2 beautiful nieces came to stay and I took them for a dayout to a theme park. We had so much fun I wanted to record the memory straight away and what better paper collection than Glitz Maya!

I used Maya navy (reverse side), stripe, polka and patchwork. I also added into the mix some Glitz pink frosting, some Detour cardstock alphas and some Plum crazy Alphas aswell as my favourite teeny alphas in pink block and black round.


As I'm sure you can imagine I had lots of photos of the day so decided to include lots of small ones in my layout while using the bright colourful ferris wheel photo as a base. The Maya patchwork paper is great for adding little touches of all the colours in the collection when it's cut up and I used the patterned rectangles as small corner mats for my photos.


These small mounted photos I added to the right side of the layout on foam pads for added dimension, aswell as adding my journalling to the top right corner and a line of the yummy pink frosting, which is super easy to use as all the gems are attached on a sticky strip!


Then I added my title using a mix of Glitz Alphas. I love how all the different styles and colours work together and are linked by the super fab teeny alphas! A bit of rainbow ribbon which fits perefctly with Glitz Maya, I think, and some bobbles finished off my colourful fairground layout.

Looking at these 2 layouts side by side I love that they mark a passage of time recording two very different days out and that I was able to reflect that artistically using two very different Glitz designs collections.

I hope you enjoyed my litle trip through scrapping then and now with Glitz designs. Thanks for stopping by and until soon Happy 'Glitzy' Crafting

Love
M x

Thursday, 10 June 2010

1 Glitzy cheeky face and a Daddy's girl!

Hi all, today I want to share with you my 2 latest Glitzy creations using the fabulous new lines from Glitz Designs! All the new lines are so yummy and being spoilt for choice I decided to be guided by my photographs.

My first layout uses a photo of my cousins little boy. I haven't actually got to meet him or his sister yet as they all live in the States but via facebook I can keep tabs on them all and 'steal' all the family pics :) I've wanted to scrap this photo for ages and the Glitz Kismet line is the perfect choice to do just that!


1 Cheeky Face

My Glitz shopping list for this page is:
12x12 papers : Kismet floral (x2) Kismet brown and Kismet numbers
Glitz Designs clear distressing stamps (D2343)
Glitz Designs Save the date stamp set
Kismet journalling cardstock stickers
Kismet rub ons
Kismet Glitzers
Glitz Designs red block teeny alphas
And all I added from my stash was some Vintage photo distress ink.

This was one of those layouts that, for me, made more sense working from the inside out, I knew what I wanted to do with the photo so I started there and let the rest fall into place.


I cut a mat for the photo from Kismet florals, I love the colour combo of this line. Blue and brown go really well together and the pop of red works perfectly!


I wanted the photo to be framed as if it was bursting out of the page so I trimmed a frame from the blue side of Kismet florals (one of my loves of Glitz is the double sided papers!) and ripped out the centre, rolling back sections to reveal the floral side (another love of mine is the quality of the papers, they are heavy weight and stay where you put them!) I then used the star frame from Kismet numbers, again ripping out the middle, for the outside of the layout and cut a thin irregular frame from the centre I had ripped out to 'anchor' my photo frame on the layout.


To add a little extra interest to the bottom left of the layout I stamped with the Glitz ditress stamp, this pattern is feintly in the cream side of the Kismet brown paper I used for my base. And while I had the ink out I stamped some numbers from the save the date stamps onto some of the blue paper, cut them out and distressed them.


Before sticking down my photo assembly I added a journal block to sit under it, these cardstock stickers are not only great quality heavy duty cardstock but they are super sticky so position carefully before committing!!


I love, love, love Glitz rub ons, again the quality is the best I have ever used and one of my favourite things to do with them is to apply them to acetate, cut them out and use them as embellishments. I did that with the Kismet rub ons bird and bee and also did the same with the Kismet Glitzers flower stickers, transparent stickers with bling on them, so different!


With my embellishments cut out I added them to the layout on foam pads for extra dimension and finished the layout off with my journalling and the Teeny red block alphas which co ordinate with the Kismet range perfectly!.

And so moving on ... fathers day is coming up so I wanted to scrap a picture of my Dad and came up with one of my favourite pics of us together


Daddy's little Girl

Ok it was taken a while ago .... quite a while ago LOL But I didn't want to make it a vintage layout (no cheeky comments thanks!) and I didn't wanted it to be all the colours we associate with male layouts. I think the Glitz Maya line was the perfect choice to avoid all the obvious! (with a little distressed couture thrown in for good measure!)

Here's my Glitz shopping list:
12x12 papers; Maya patchwork, Maya polka, Maya Navy, Maya stripe and Distressed Couture blocks
Glitz designs Polka dot rub ons (black)
Maya Titles cardstock stickers
Maya accents cardstock stickers
Hot Mama Alphas
Glitz Designs Pink block teeny alphas
Maya Glitzers
I added a bit of ribbon, white cardstock and a couple of staples from my stash and used my sewing machine.


Maybe it's my brain at the moment, maybe I'm inside out! but again this is how this layout worked for me! I started with the photo and it's mat, which was a heart within a heart (the inside one from Maya patchwork and the outside one the text side of Distressed couture blocks, I love the news print!) I cut out the photo, losing the unnecessary background and mounted it on to white card, cutting it out and doodling to add a funky cartoon feel.


I wanted to 'ground' my hearts on the page so started to build up strips of the yummy Maya paper behind it (with liberal lashings of distressing :)) I added a small piece of the polka dot rub ons to the top left to add interest and used sections from Maya patchwork to build up the stripes on the right adding ribbons between the layers.


To measure time I added the ruler from Maya titles and used this as the place to add my journalling.


With the base assembled I stitched all the way round the 12 x12 using my sewing machine and also used a zig zag stitch between the layers of maya patchwork and to pick out some detail on the heart.


After adhering the heart I added my title with the Hot mama Alphas. I ran out of small case d's so I cut around the outline left on the sticker sheet and used that! The teeny pink alpha blocks work perfectly with my colours and adding the bird from Maya accents pulled the sections of the layout together.


My finishing touch was to cut a small section from 2 Maya Glitzers frames to make crowns for me and my Dad!!

So that's my Glitzy offering for now, the colours in both these layouts make me happy, so what will you create with some Gitzy goodness that makes you happy? Don't forget to check out the Glitz Blog regularly for extra daily inspiration from the talented Glitz girls! Thanks for stopping by and until soon Happy Crafting
Love
M x