Monday, 18 April 2011

Glitzy Springtime and Bunnies

Hi all,
Spring is here and with it arrived a box of new goodies from Glitz Designs on my doorstep. It's contents made me smile as much as the blue skies, the flowers in the garden and the lambs in the field, the new lines are yumsville and I know you're going to LOVE the new stamp sets. So what better thing to scrap first than some Spring photos!


This layout is inspired by the beautiful Spring day today and the 'song' I have journalled. It is from one of my all time favourite films Willy Wonka and the chocolate factory (the original Gene Wilder version, love you Mr Depp but Gene rules this one!) and I sing it a lot at this time of year, but originally it came from As you like it by Willam Shakespeare and even then he was quoting from a celtic ballad 'it was a lover and his lass' ... hmmm best stop waffling and let you know what I used!

Glitz Designs Afternoon Muse papers; Banner, Stripe, Block, Floral, Carte Postal, Polka
Glitz Designs Laced with Grace paper; Butterflies
Glitz Designs Afternoon Muse and Love Games Clear Stamps
Glitz Designs Afternoon Muse Glitzers
Glitz Designs Afternoon Muse Paper Layers
Glitz Designs Teent Alphas; Burnt Orange, Cream, Bubble gum pink, aqua block, yellow block, apple green block
Glitz Designs Maya cardstock stickers


I cut out all the shapes I needed for the fields, rainbow and clouds etc distressing edges as I went. When doing a collage like this I use a plain 12 x 12 piece of cardstock to build it on so I don't waste too much of my precious paper (this also means it's a great way to use up scraps!) The colours and patterns of the afternoon muse papers are great for my happy spring collage, love that polka paper!


The hot air balloon and sun rays are made using the new stamps. So useful and so much fun not to mention brilliant stamps that give a great image every time.


I took some photos of the lambs in the field next to our house and cut them out to fit into my collage and cut out the photo of my nieces (a great way to lose a dodgy background)


With scissors still in hand I cut out lots of flowers from the floral paper even ones that were missing petals (as they are tucked under flowers in the design) and those around the edges as they still work when I layer everything up.


Once I'd layered all the flowers around my photo and tucked some behind the 'hills' I cut out some of the butterflies from the laced with grace paper, curled the wings and added them all over the collage.


Finally I set to with the teeny alphas. My favourite all time alphas ever and I LOVE the new additions to the line with their mixed up style of letters, the colours make my heart sing! I added some doodled journalling inbetween and doodled in places on my collage


and that was it done, a happy spring time layout with one of my favourite photos of my nieces. My second layout stays with my beautiful nieces and something else that happens at spring time ... Easter.


This is a record of a really fun Easter weekend spent with them and my sister. Decorating eggs, eating roast dinner and driving the girls crazy with a fiendishly clever Aunty Michelle treasure hunt LOL. Here are my ingredients;

Glitz Designs Laced with Grace papers; Rose, Stripe, Polka
Glitz Designs Afternoon Muse paper; Floral
Glitz Designs Laced with Grace Peek-a-boo
Glitz Designs Laced with Grace Clear Stamps
Glitz Designs Afternoon Muse Peek-a-boo
Glitz Designs Afternoon Muse Cardstock Stickers-titles
Glitz Designs Afternoon Muse Paper Layers
Glitz Designs Clear stamps Distressing set 2
Glitz Designs Teeny Alphas; cream


The orange tones with the playground imagery from Laced with Grace mixed with the Afternoon Muse yellow were perfect to tell my story. I broke up the orange 12 x 12 by stamping, using a distress stamp with yellow paint, around the area my photos would sit to tie everything all together.


I stamped images on to the yellow paper and also adhered one of the Afternoon Muse peek-a-boos onto it to pop it off the page.


I lifted my photos by matting them onto some of the polka paper and cut out the photo of my bunny eared niece to create a photo embellishment of my own.


I framed my cut out niece with a peek-a-boo from Laced with Grace and as it has a cut out centre I could pop her out of it on foam pads for dimension. I added an orange butterfly from the paper as an extra embellishment.
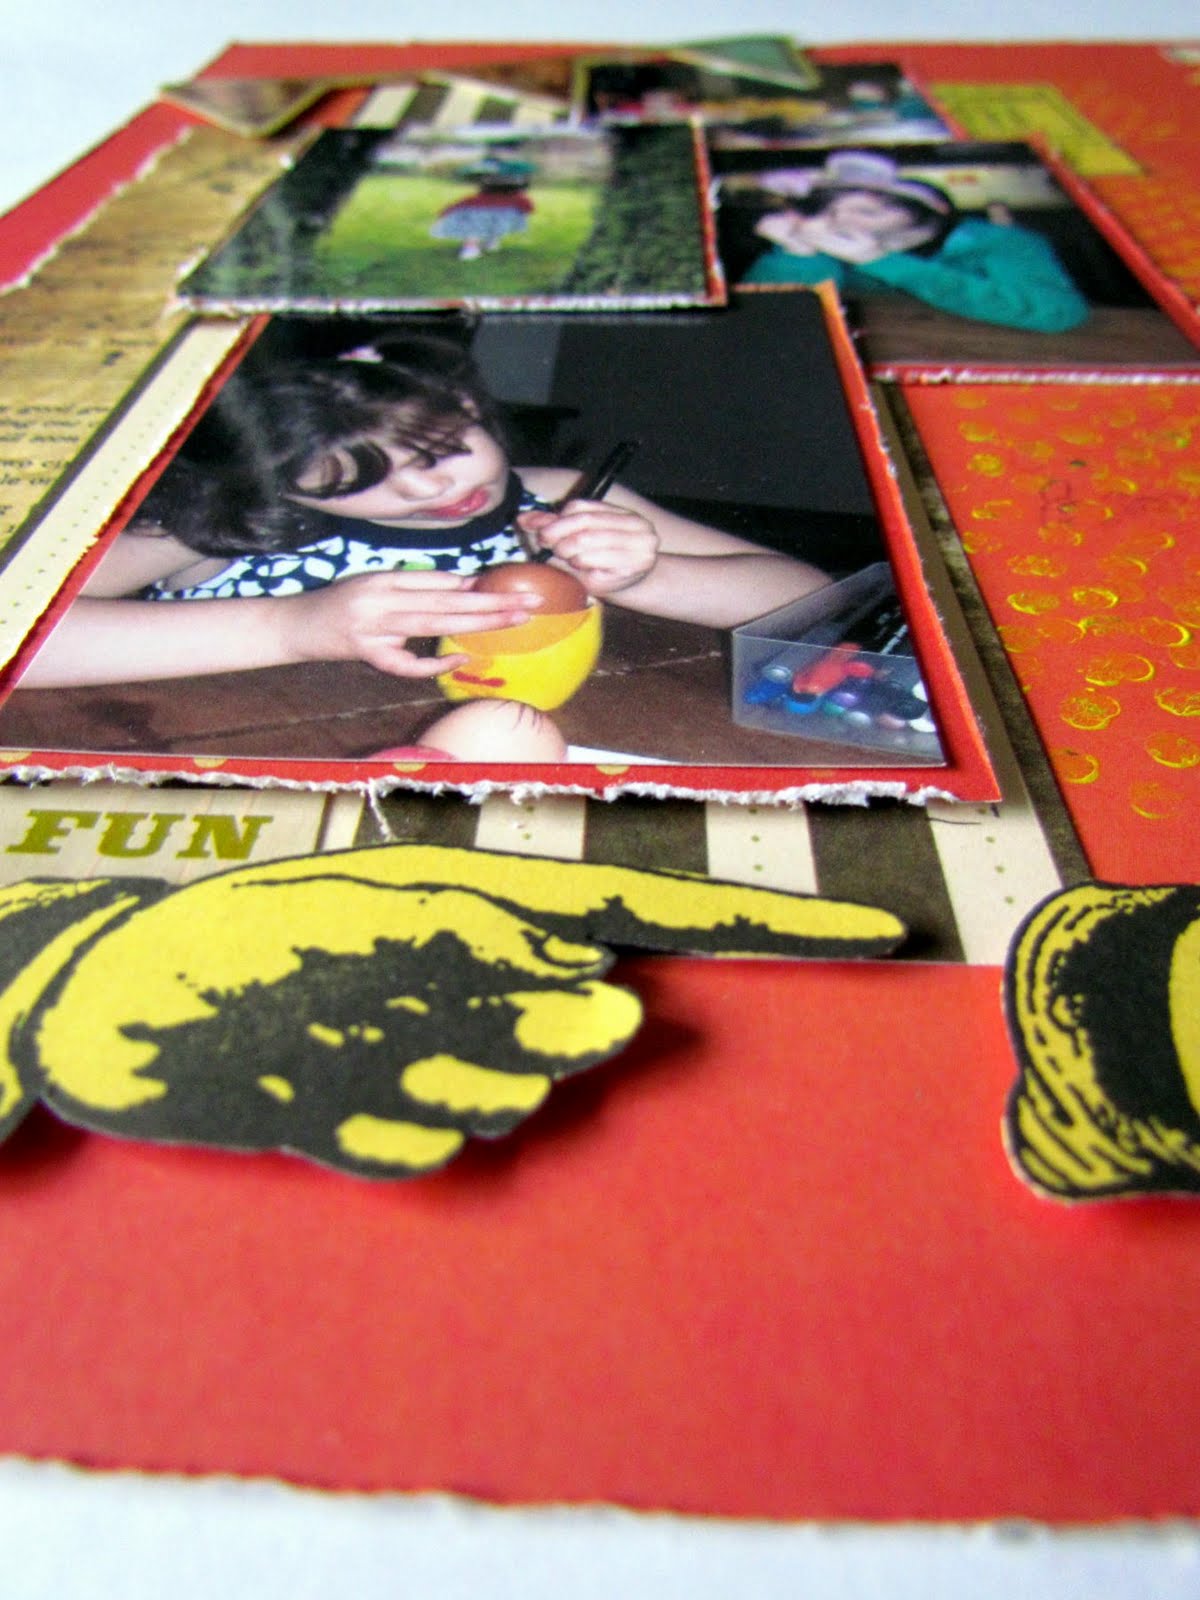

The cut out stamped images, cardstock stickers, a paper layer and those gorgeous teeny alphas finished off my layout. Another happy layout that makes me smile

So what new Glitzyness will you use to make you smile? .... warning! You will be spoilt for choice .... whatever it is please share it with us and now there is the perfect opportunity to show off your Glitz with the new Monthly challenge, see details here and get Glitzy and creative!

Thanks for stopping by and letting me share my projects with you. I hope you're all well and happy and enjoying Spring, until soon Happy Crafting
Love M x

Monday, 4 April 2011

Old Techniques and favourite stamps!

Hi all
It's my turn to share a project over at the Lily pad. A revisit to an old chalky technique and some of my favourite Banana Frog stamps


As ever the step by step instructions are over on the frog blog so why not hop on over and check it out, and while you're there snag a bargain, there's an AMAZING sale on stamps in the shop!!!

I hope you're well and happy, I'll *see you* soon, until then Happy Crafting
Love
M x

Friday, 1 April 2011

NEW and absolutely FREE craft stamper e-zine

Hi all

Have you heard about the new kid on the block?? We all know and love the Craft Stamper magazine right? Full of inspirational projects covering all crafts with a twist of something different thrown in for good measure!....

..... Well today see's the launch of the craft stamper e-zine FREE to download NOW


and packed full of projects, 12 complete step by step projects to be exact, all projects chosen from the best of 2010 by the readers so what are you waiting for? ....

.... oooh! wait! there's more! add this....


...Blog button to your side bar (adding this link http://www.craftstamper.com/ezine/ to it) and then go to the Craft stamper website and leave a comment, there is blog candy available so really it's a win, win situation for all of us .. a free e-zine and the pleasure of spreading the word about it with blog candy thrown in for your efforts woo hoo!

So go download and spread the crafty word to one and all wherever you can shout about it, from face book to the roof tops and anywhere in between .... you know it makes crafty sense!

I hope you're all well and happy, enjoy your craft stamper e-zine and I'll see you soon .... Happy Crafting!
Love
M x

Wednesday, 30 March 2011

A {Tweet} Froggity Blog hop!

Hi all

Well another month of 2011 gone and it means it's the Banana Frog blog hop time once again! With Spring in the air the theme for this month is birds and I hope you've been enjoying the {tweet} offerings from all the other froglets :) If you're here without hopping why not hop on over to the Lilly pad and start at the beginning to be inspired!

So without further ado here is my feathery offering for March ...


Is it a piece of wall art? is it an embellishment? or is it a bespoke brooch? ... the answer I think is all of the above! It's small and cute and oh so easy to make.

I used the Hiya Chick stamp set and the shake your tail feathers tadpole stamp set alongside some chipboard, music paper, gesso, distress inks, blonde moments embossing powder, small flowers and bling, some scrap paper and some craft wire. (by the way both stamp sets are on sale at the moment go grab a bargain!!)


Using the transparent image sheet in with the stamps I was able to draw out a template big enough to accommodate the bird on the branch and then cut this from a piece of chipboard.


I covered it in strips of music paper..


.... then trimmed it to shape and painted it with gesso.


I coloured it with distress inks ..


... and then stamped the end of the branch around the outside for a decorative pattern and embossed the bird. Some of the embossing powder stuck to the pattern I had stamped, a happy accident as I like the way it fills the branch out :)


Stamping the sentiment from the tadpole set ...


.... I then cut it up, inked it and added it to my collage along with some tiny paper flowers.


Leaving my collage aside to dry I made a wire cage to go over the top of my compositon. A little fiddly but worth the 'slightly' blue air in my studio LOL


I slipped the cage over the top of my chipboard collage...


...and attached the craft wire at the back with masking tape.


To finish off the back I glued some scrap paper onto it, trimming away excess with a craft knife and sanding any rough bits with a nail file


et voila, a cute little birdcage that could be used for anything you like!


I like it as a little wall plaque and think it would look great as a set of 3 but also think it would look great as an embellishment on a special card or scrap page and would look cool as a brooch by just adding a brooch pin to the back .... why not have a go and show me what you do with yours?

Thankyou for visiting my little corner of the lilly pad today your next hop stop is with the lovely and oh so talented Jo Firth Young and don't forget to leave comments where ever you go there may be prizes!

I hope you're well and happy and until soon Happy Crafting
Love
M x

PS My limited edition Art Tart DIY project CD's are available on my website see the post under this one for details and links ... why not try something different today :)

Friday, 25 March 2011

The Art Tart DIY CD collections

Hi all

How are you? I hope the sun is shining with you today, doesn't life seem so much better when the sun shines?? I seem to have been so busy these past few months, chasing myself coming back that it's been difficult to think straight but with the sun shining and spirits lifted I think it's about time for a shake up on many levels ;)

I feel I have neglected my little corner of blogdom of late and my poor website is in desperate need of some TLC so there will be spring cleaning and re vamping going on over the next few weeks!

I also feel I have neglected the crafter within me of late but never fear the craftiness inside is waking up and I am cooking up lots of very 'Michelle' things that will become the focus of my attention going forward .. isn't it all too easy to get bogged down with things sometimes? But no more! I am flinging my arms wide and embracing new challenges with a spring in my step!

I had a great time at the Olympia stitch and craft show last weekend and I think that was also a big 'wake up and take stock moment' for me as I had a gallery of my work out,things I had forgotten about and things that I miss! I had great workshops and met some lovely people .... all the lovely comments did me a power of good so thankyou to all the great people who crossed my path! I will share workshop photos soon but first the other thing I want to share from the show are the 2 DIY project CD collections I produced for the show.

Each CD contains 4 of my full step by step DIY projects with templates and 11 bonus projects of workshops I have done over the past year oh and also 290 photos of my gallery for you to peruse, scrap lift and hopefully be inspired by. Many people have asked me for a book of my stuff and at the moment this is the best way for me to share :) They were made as a limited edition for the show so there is only limited stock so please pop on over to the shop on my website www.mjm-thearttart.com and grab a bargain. Each CD is £10.00 that's 15 projects (A single DIY project has been on sale for £5.00 - £7.50) for a bargain price (and no P&P when posting within the UK) Here's the pics of the covers so you get an idea of what's on offer ...


The back cover is the same on CD 2 just blue LOL

There are more DIY projects being cooked up at the moment and lots more exciting things, watch this space, that crafter within is taking over LOL.

And Finally just before I go the other thing I have neglected is sharing photos of the terrible twosome Stan and Ollie, they are as adorable and funny as ever and I will share lots more of their antics soon, in the meantime here are my boys ...


Thanks for letting me waffle on :) and thanks for popping by, don't forget to pop on over to the website to snag a CD bargain .... the website will be going off line in a week or so for it's overhaul and spring clean so grab em while you can!

I'll be back soon, I hope you're all well and happy and as ever Happy Crafting!
Love
M x

Thursday, 24 March 2011

Glitzy scraps and a message to me!

Hi all
It's my turn to share my Glitzy corner of the crafting world with you for this month and I thought I would look at using up some of those scraps that we all keep!
I love that you can mix and match the paper collections in the Glitz Designs lines, the colours and patterns work really well together and both my layouts this month show that so without further ado let me share my creations;


This is a layout showing a sequence of photos my husband took of the grandchildren while he was having a conversation with them via skype ... the wonders of modern technology heh!
The ingredients;
Glitz Designs Hoopla papers - pipework, frames, floral
Glitz Designs Scarlett paper - wallpaper
Glitz Designs Love nest paper - stripes
Glitz Designs Scarlett paper layers
Glitz Designs Scarett glitzers
Glitz Designs Clear distressing stamps - distressing round


I created a mat and layer for my main photo and worked out it's position on the page (the pencil marks you can see are the position of the bits on my layout that I laid out before committing to the design!) I then distressed the edges of the 12 x 12 and inked it. Using the distress rounds stamps I then added some circular shaped features to the background with some peeled paint distress ink.


I then ripped the edges of some of my scraps....


.....and assembled them with the photo and mat in position


I cut mats for my small photos and creased and curled the edges upwards to add dimension adhering them to the layout at various levels using foam pads for dimension


Taking a paper layer I cut the phone and speech bubble from it and mounted them on cardstock to create embellishments


And added them to my layout on foam pads for dimension along with some ribbon for texture and my journalling.

I love this layout as the photos not only tell a story of a conversation but catch Sophie and Dylan being absolutely natural!

Moving on ... recently I have been giving myself a good talking to. I think it is all too easy sometimes to get caught up in the hustle and bustle of life and forget to touch base with ourselves so this layout is all about me and the secret message I have written to myself on the hidden journaling block.


The sentiments of the Glitz Designs stickers fit this layout perfectly, and so to the ingredients;
Glitz Designs Love nest paper - polka
Glitz Designs Hoopla papers - zebra and polka
Glitz Designs Scarlett paper - polka
Glitz Designs Love nest rub ons
Glitz Designs Love nest glitzers
Glitz Designs Love nest cardstock stickers - titles
Glitz Designs Love nest what nots
Glitz Designs tulle
Glitz Designs frostings in pink and clear


I distressed the edges of the 12 x 12 liberally


Then cut out 3 portrait photos of me and mounted them on to some Glitz paper ...


.... cutting them out with a loose border and mounting them onto some distressed rectangles of Scarlet polka paper. I also added some hessian across the page, yet more polka paper and some pink tulle.


After adhering the photos onto the page with foam pads for dimension I added some secret journalling to a what not ....


... creating a secret pouch for it on the back with foam tape and paper, leaving the sentiment at the top poking out.


Cutting the roses from the polka paper I created an embellishment to sit under the remember tab.


Adding cardstock stickers said everything I needed to say on the layout and I had a bit of fun with a birdie rub on, a glitzer crown and some frosting.

This is a very personal layout, and I love the fact I have been able to hide the message I have written to myself on the the what not.

So what will you do with your glitz scraps? what message do you wnat to write to yourself? Whatever it is you want to create I know you will find just the right Glitzy product to help you along the way.

Thanks for stopping by, I hope you're well and happy.
Until soon Happy Crafting
Love
M x