Friday, 26 November 2010

Lilypad lesson

Hi all

This is the last of my Banana Frog triple for now :) My Lily pad lesson for today


Me and you, canvas on canvas

Class is in session now over at the lilypad and over there you will find step by step instructions for stamping onto canvas, image transferring onto canvas and creating a bespoke piece of home decor to create your own canvas on canvas project


I love the dimension of this piece and it takes pride of place on a little easel on my bookcase in the front room now


Another bonus is the swirl stamp set that I have used is in the Banana Frog sale at half price, so you can grab a bargain to boot when you visit the Lilypad today :)

I hope you enjoy class and I hope you feel inspired. I'm off to start creating the next project to share with you ... whatever that may be :)

Thanks for stopping by, stay safe, well and happy and until soon Happy Crafting!
Love
M x

Thursday, 25 November 2010

Project on the Lily pad

Hi all

Here's the second installment of my Banana Frog triple, today it is my turn to share a project of the day


I have expanded on my trick or treat bag from last month and gone all festive with some fab Christmas stamps (Retro baubles on sale now for just over £3, and loads of other goodies at crazy prices, it would be rude not to shop!) As ever hop on over to the Lily pad for the full blown step by step instructions to create some festive treat bags for yourself!

Ok I am hopping off myself to get my lesson at the Lilypad ready for tomorrow, class starts at 9am ... don't be late :)

As always I hope you're well and happy and until tomorrow Happy Crafting!
Love
M x

Wednesday, 24 November 2010

A Froggy Autumn

Hi all,

It's the second installment of the Banana Frog sketch focus for this month and this is my offering


Hop on over to the Lilly pad and check out how the other froglets interpreted it but before you go I'd like to share a quick step by step of the layout I made.


I used some small leaves from 3 different stamp sets; totally tropical, tropical taste and build a daisy and arranged them in a pattern on a stamp block to create the pattern on the paper strip across the layout.


I tore a strip of cream card and using a clear embossing ink stamped a pattern of the leaves and then embossed them in gold.


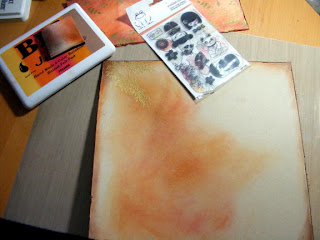
Using a spice big and juicy ink pad and some cut and dry foam I coloured the strip of stamped card with all the lovely spicey colours in the pad


Next I customised my 12x12 brown Kraft cardstock by distressing and inking the edges, coloring a block in the middle with some more ink from the big and juicy ink pad and stamping the cherry blossom stamp from the Banana Frog Kawaii Kokeshi stamp set in the top corner and then embossing it in gold


I stamped out my title using the rosecube alpha stamp set and mixing up the colours from the big and juicy ink pad, cutting them into letter tiles


And lastly my journalling block came from the totally tropical stamp set, cut out and distressed again with the spice ink


I assembled it all with some more torn cardstock in dark brown, some vintage lace and small photos mounted onto distressed mats of brown cardstock.


I love the autumny colours of the big and juicy ink pad and the gold embossing of the simple stamped images.

And that's it for today, what will you create with your Banana frog stamps and autumn colours? There's still time to hold onto autumn before the winter really sets in!

I hope you're well and happy, This is the start of a Banana Frog triple for me so I'll see you tomorrow with my project of the day, until then Happy Crafting
Love
M x

Tuesday, 23 November 2010

Love abiding with Glitz Designs

Hi all,
Today I get to share some more Glitzy goodness with you ... I am so lucky to get to play with the amazing Glitz products and new lines and I am so lucky to be married to a wonderful man. 19 years ago I met my soul mate and 11 years ago this month I got to marry him. It has become a little tradition of mine over the years that I scrap a page of us then and now, this year my page was prompted by the Scarlett paper layer I’ve used.... a perfect sentiment and a perfect Glitz line!


Love Abiding

Glitz Designs Scarlett papers; Wallpaper, Polka, Bouquet
Glitz Designs Scarlett Paper Layers
Glitz Designs Scarlett Rub ons
Glitz Designs Scarlett Peek-a-boo
Glitz Designs Scarlett Glitzers

Now I have to confess I thought I would stick to the darker colours of the Scarlett line but I was drawn to the yellow side of the Bouquet paper so much I had to use it, which scared me a little as I think this is the first time ever that I have scrapped with these colours, but do you know what? I loved using a different colour palette, it was refreshing and so easy with everything co-ordinating within the line.


I cut the beautiful floral corner from the Bouquet paper, tore a strip from the green polka of the same paper and a large green rectangle from the wallpaper 12 x 12(love that green!) For my page base, distressing edges and inking.


Layering it up I tried to make things overlap in places to meld it altogether.


I printed some small ‘then’ pictures of us in sepia and distressed them with my trusty nail file.


And printed a large ‘now’ picture of us in colour, matting it onto some of the bouquet paper, distressing the edges and curling them up to add dimension.


After layering the 3 small photos down the page I added one of the new embellishments to the Glitz family, a peek-a-boo, a pack of fun designs printed onto transparent film to overlay and layer up. I used the lovely frame one to pick out a photo of us on our wedding day, attaching the top right corner with silicon glue as this would be hidden by the main photo.


To tack the opposite corner of the peek-a-boo down I used some of the pretty Scarlett Glitzers, they tie in beautifully with my floral corner and also add the perfect amount of bling (those crystals are encapsulated within the stickers, so easy to use!) while acting as a fastener.


I ripped the bottom and one side of the paper layer which started this layout and inked the edges before simply adhering it to the page to sit under my main photo which was added on foam pads to make it stand out.


Lastly, to tie in the floral bottom corner of my page and to add an interest to a bare, sharp corner of the main photo I applied a rub on to a piece of acetate and cut it out, the rub ons are so super strong and beautifully detailed they are great to create your own embellishments, adding them to acetate allows you to use them in other ways than just flat.


I added it to the top corner of my photo on foam pads, added a bit of handwritten journaling to the top left corner and voila there is this year’s then and now layout.


A complete departure on the colour front for me but I love it and I also love the fact that everything on this page is from Glitz and all from one line to boot!

I hope you’re having as much fun as me creating with the new Glitz products! Thanks for stopping by and I’d like to take this opportunity to wish all my Family and friends in America a very happy and peaceful thanksgiving. Until soon, Happy Crafting!
Love
M x

Friday, 19 November 2010

A Beautiful Glitzy Autumn

Hi all,
It’s that Glitzy time of the month again when I get to share a project with you AND some of the new goodies that the Oh so talented Glitz team have brought us. If it’s possible to be in love with paper products I am head over heels ... the biggest question is where to start! Which line, which exciting new embellishment to use?
To be honest I wanted to use it all but settled with a little ... for now!


Beautiful Autumn

We don’t have thanksgiving here in the UK but there are times in life that stop you in your tracks to give thanks for family, friends and moments like these. Driving home on bonfire night last year Mother Nature made me stop in my tracks, get out of the car and snap this pic on my mobile phone. Who needs a firework display to ‘oohhh’ and ‘ahhh’ at after you’ve seen this! I wanted to record it in a scrap page and the new Love Nest collection from Glitz Designs was the perfect choice.

Glitz Designs Love Nest papers; Polka, Sky, Damask and Floral
Glitz Designs Love Nest Rub ons
Glitz Designs Love Nest Cardstock stickers; Titles and Journalling
Glitz Designs Love Nest What Nots
Glitz Designs Tulle


I marked out an aperture, slightly smaller than the photo which I wanted to be central (unusual for me!) to take focus, and cut it out with a craft knife from the polka paper. I then ripped a square from the reverse of the sky paper (a fabulous scrunched up brown paper) to add a frame over the frame and ripped out the centre.


After ripping out the polka aperture, distressing paper edges and inking copiously I adhered the brown paper frame to the page and then ripped back into the polka aperture to roll and fold sections back.


To continue the optical illusion that the photo is popping out of the paper I then backed the aperture with the damask paper.


I added the photo into the frame on foam pads to add more dimension and used some words from the Love Nest titles, journaling and rub ons packs as well as adding the cute bird rub ons to fill the edge.


To pull some of the fabulous citrus green colour from the title stickers I tore a strip from the green side of the floral paper, I love how Glitz add contrasting colours that really pop in their collections so you can mix it up. I also tore another strip from the brown paper side of polka, inked them and attached them across my page with just enough green peeking out.


One of the new additions to the Glitz lines is the Tulle which comes in yummy colours, I used a strip of the brown attaching it across my page with brads and twisting it to add interest. I also twisted and tacked down the bit of tulle that would sit under my journaling block to add more shape (and also to make it easier to add the block!)


I sanded, distressed and inked the Love Nest What Not, I love that Glitz has brought out a set of What Nots to go with each new line, they’re so useful and so much fun!


I used the What Not for my journaling and added it to my page.


The finishing touches were some flowers and vines to reflect nature and to tie in all the elements of the page. And that’s it a record of a most amazing display from Mother Nature brought together beautifully with the new Love Nest line from Glitz.

That’s all from me for now, I’m off to delve back into my box of Glitzy goodness and create some more .... Now which line next? Scarlett or Hoopla? And Oh look at those peek-a-boos......

Thanks for stopping by, see you soon and until then Happy crafting!
Love
M x

Designer Friday at the ranch

Hi all
Today is designer Friday over at Purple cows with little old me, I have created a super simple photo cube


Perfect for a Christmas present don't you think? And here's an alternative for that special person who can never make a decision


Pop on over to the ranch and see a fuller description of my super easy project!
and pop by later around 2pm, I have some Glitzy goodness to share :)

See you then
love
M x

Monday, 15 November 2010

It's a {thrifty} creative world

Hi all
Well here I am again .... so soon!! Today is my turn to share a project over at It's a Creative world, an inspirational blog full of wide and varied crafty inspiration and a great team of girls!

My project this month is a thrifty pretty


We all love those prima vines, but not so keen on the price! So pop on over to It's a creative world and follow my step by steps to have a go at making your own!


A great Christmas present for a crafty friend, unusual and bespoke, easy to make and as I said most importantly thrifty :) Enjoy!

Good to *see you* If I don't see you before I'll see you here on Friday with some delicious Glitzy goodness, and of course Wednesday on Create and Craft with Serif! Until then Happy Crafting
Love
M x

Saturday, 13 November 2010

Tis me!!!!

Hi all!

Yep tis me!! Although the old bloggity blog has been ticking over nicely with DT posts that I schedule to do their magic by themselves I have recently realised it's July since I was here in person ... eek!! So I thought I would drop by and say 'yoo hoo' and do a quick catch up on life in general, I'll try not to make it too long even though it's been nearly 4 months!!

I don't know about you but time seems to be going crazy fast at the moment, I can't believe it's nearly Christmas again and my battle cry at the moment is definitely more hours in a day please!

So as you may or may not know a lot of my time recently has been taken up with Create and Craft TV. Never in a month of Sundays did I ever think I would be guesting on TV shows, let alone doing live hours but do you want to know a secret? I'm really enjoying it! It helps that I love the products I take on; Purple Cows tools and Serif digital scrapbook artist 2 and it also helps that everyone at the studios is so lovely and so much fun to work with!

Talking of Serif digital scrapbooking, that's another never in a month of Sundays moments for me! never did I think I would love digi scrapping but I am, here's a small selection of my latest favourite pages


The software makes it so easy and creating my own papers and my own embellishments has never been more fun!

This month me and him celebrated our 11th wedding anniversary! We've been together 19years now and to be honest it seems like 5 minutes, I am a lucky girl to have met my soul mate, here's a montage of then and now


Blimey we look so young in some of those pics!! On the same day as our anniversary Sophie was born 4 years ago so we had a trip to Devon to see the grandchildren.


I went armed with a birthday tea, complete with egg sandwiches, sausage rolls and cheese and pineapple on sticks LOL Sophie decided she liked cheese puffs and chocolate cake together the best and Dylan managed to polish off most of the sausage rolls!

Way back at the end of July, when I last did a 'live' post I mentioned we were off on a cruise. Hubby was working on it so it was a cheap birthday treat for me and we had a fab time. It was a Baltic cruise, and the main reason I wanted to go, as we had 2 days in St Petersburgh Russia and it was AMAZING! We also met some great people, ate too much and endulged in the old vino LOL here is a very small collection of photos (you can only imagine how much I could bore you with more!)


Back in September I was honoured to be featured in the September issue of Craft Stamper magazine in their stamping for scrapbookers section with an image transfer technique, here's my layout


Keep your eye out for more features in 2011

I mentioned Christmas earlier and in this household that can only mean one thing ... it's panto season ... oh yes it is!!! Hubby is in Bristol again this year at the Hippodrome with the lovely Barbara Windsor and back in September we spent a couple of days in Bristol for the launch


Rehearsals start next week and it opens at the beginning of December. It's going to be a goodie!

October saw the end of my 2010 workshops at Bee Crafty :( I've had a fab year with the girls there and all that attended the workshops, I particularly liked it went Santa came to visit when we made the light up Christmas tree :)


Let's see what 2011 brings!!

2011 is filling up with bookings too. I'll be at Stitches in February, Olympia in March, Scrap-a-mia in May and sparkle dreams in October, check out the side bar for details and any additional info and I'm also working on something exciting that I hope to bring you all soon :)

And that's it really, the last 4 months kind of caught up on, life is mighty busy but I can't complain because life is good and at the end of the day I am getting to do what I really love .... create!

So all that's left for me to say is ... 'and finally' ...


The boys are doing really good, they make me laugh every day and are my best friends. Ollie recently went through it a bit following an op, he was very poorly and did put me and Stan through a week of trauma but I am happy to report he is back to normal and terrorising us as ever! (thankyou to all those that sent well wishes during all that via email, blog, facebook and daisy trail!) As you can imagine I have many, many photos of my fur babies so here are just a few collaged together so you don't lose the will LOL


I've really enjoyed this visit with you and thanks for stopping by, I've missed this 'live' blogging and will try and pop back soon to do it again!!In the meantime I have some DT posts coming up so hopefully I'll *see you* then. I hope you've all been keeping well and happy yourselves and until soon Happy Crafting
Love
M x